Smooth Away Face Cream

LAB NOTES & SAFETY NOTICE
For educational purposes only. Content reflects personal, non-professional formulation experiments and is not instructional.
No formula or information on this site is intended for commercial use, consumer application, or third-party use.
Accessing this content means you accept all risks and full responsibility for safety, testing, legal compliance, and outcomes.
[Full Legal Disclaimer & Safety Requirements]

Hello everyone!

IMG_20181029_082916 (1)

Continue reading Smooth Away Face Cream

Spring Hydrating and Multivit – Face Cream

LAB NOTES & SAFETY NOTICE
For educational purposes only. Content reflects personal, non-professional formulation experiments and is not instructional.
No formula or information on this site is intended for commercial use, consumer application, or third-party use.
Accessing this content means you accept all risks and full responsibility for safety, testing, legal compliance, and outcomes.
[Full Legal Disclaimer & Safety Requirements]

Spring Face Cream - Itsallinmyhands

My “Multivit” Spring Hydrating Cream

Hello Hello! 😀 Today I’m so happy to share my recipe for a “skin-awakening” cream. I made this specifically for the transition into Spring. During winter, my skin always ends up looking a bit dull and “tired,” so I wanted something light, super hydrating, and packed with vitamins to bring back that healthy glow! yeheee!

The Vitamin Cocktail:

I didn’t want a heavy, occlusive cream; I wanted a “water-bomb” effect. I used a combination of Pro-Vitamin B5 (Panthenol) for healing, Vitamin E for protection, and a touch of Vitamin C (the stable version!) to brighten things up. It’s like a fresh smoothie for the face!

The Formula:

Phase A:

  • Water to 100

  • Glycerin 3

  • Xanthan Gum 0.2

  • Hyaluronic Acid (1% solution) – 5 (This is the secret for that “plump” Spring skin!)

Phase B:

  • Emulsifier (I used Olivem 1000) – 4 (I lowered it slightly from 5 to 4 to keep it lighter for the warmer weather.)

  • Rice Bran Oil – 3 (Very light and full of antioxidants.)

  • Jojoba Oil – 2

  • Ethylhexyl Stearate – 3 (This is a very fast-spreading “dry” oil that helps the cream absorb in seconds!)

Phase C (The Vitamin Boost):

  • Panthenol (B5) – 1

  • Tocopherol (Vitamin E) – 1

  • Sodium Ascorbyl Phosphate (Vitamin C) – 0.5 (This stable version of Vitamin C is great because it doesn’t irritate the skin as much!)

  • Niacinamide (Vitamin B3) – 2 (My absolute favorite for refining pores and evening out the skin tone.)

  • Preservative (According to your type)

  • Fragrance (I used a “Green Tea and Lemon” scent—it smells so fresh! :D)


Notes from the Beaker:

  1. The Niacinamide Trick: I make sure to dissolve the Niacinamide in a tiny bit of water from Phase A before adding it at the end. If the pH of your cream is too low (below 5), Niacinamide can get “angry” and turn into nicotinic acid, which makes your face flush red! So I always check that the pH is exactly 5.5.

  2. Lightness is Key: Since this is for Spring, I used more “dry” emollients. If you feel like it’s still too heavy, you can swap the Jojoba for more Rice Bran oil.

  3. The Glow: The combination of Vitamin C and Hyaluronic acid gives an immediate brightness. It doesn’t hide imperfections; it just makes the skin look “awake.”

  4. Heating: Usual drill! Heat A and B to 70°C, then combine. Wait until it’s below 40°C before adding all those precious vitamins in Phase C, or the heat might destroy them!

Final Verdict: I’ve been using this for a week and my skin feels so much more resilient. It’s the perfect “reset” button after a long, cold winter. ENJOY! 😀

Aloe Vera Face Cream DIY

LAB NOTES & SAFETY NOTICE
For educational purposes only. Content reflects personal, non-professional formulation experiments and is not instructional.
No formula or information on this site is intended for commercial use, consumer application, or third-party use.
Accessing this content means you accept all risks and full responsibility for safety, testing, legal compliance, and outcomes.
[Full Legal Disclaimer & Safety Requirements]

Aloe Vera Cream Cover

In this experiment I tried to formulat a soothing, matte-finish cream designed for skin that is no longer in an active acne phase but remains sensitive and prone to congestion. I tried creating a “grease fall” that would use butters which don’t melt so easily and don’t spread on the skin like, let’s say, coconut butter.

The Technical Highlights

The “Dry” Lipid Profile (Grease Fall)

To achieve a matte finish and avoid a “heavy” skin feel, I utilized a strategic blend of lipids:

  • The “Dry” Butters: Kokum and Murumuru butters provide structural richness but possess a high stearic acid content, which leads to a “dryer” finish on the skin compared to Shea or Cocoa butter.
  • Non-Comedogenic Oils: Safflower, Black Currant, and Cranberry seed oils are high in linoleic acid. In my records, I prioritize these for acne-prone skin as they help balance the skin’s sebum composition.
  • Cetiol Sensoft: A lightweight synthetic ester used to enhance the “slip” and provide a professional, elegant texture without greasiness.
Phase Component % / grams Function
A Distilled Water to 100 Solvent
A Glycerin 4.0 Humectant
A Xanthan Gum 0.25 Stabilizer
B Methyl Glucose Sesquistearate 3.0 Emulsifier
B Cetyl Alcohol 1.8 Co-emulsifier / Thickener
B Kokum & Murumuru Butters 1.0 / 1.0 “Dry” Butters
B Vitamin E / Cetiol Sensoft 0.5 / 0.5 Antioxidant / Emollient
C1 High-Linoleic Oil Blend 2.0 Nutrient Lipids (Cold Phase)
C1 Bisabolol 0.5 Soothing Active
C2 Hyaluronic Acid (1% Gel) 3.0 Hydration
C2 D-Panthenol / Allantoin 1.0 / 0.4 Healing / Anti-irritant
C2 Silk Hydrolyzed Proteins 2.6 Conditioning
C2 Aloe Vera Powder (200:1) 0.5 Concentrated Soothing
D Preservative / Fragrance 1.0 / q.s. Protection / Aesthetic

Notes from my Beaker:

  1. The Aloe Choice: I used a high-quality Aloe Vera juice/gel. You have to be careful with Aloe because if you use the “ready-made” gels from the store, they already have thickeners in them that can mess up your emulsion. I prefer the liquid version so I can control the texture myself.

  2. The Emulsion: I heated Phase A and Phase B to about 70°C. When I combined them, I used my mini-mixer for a few minutes until it turned into a beautiful, snowy white cream. It’s so satisfying to watch it thicken as it cools!

  3. The pH Check: As always, I made sure to check the pH once it cooled down. Keeping it at 5.5 is the “sweet spot” for my skin to stay happy and the barrier to stay strong.

  4. The Feel: This cream has a “velvet” finish. It sinks in quickly but you can still feel that the Aloe is there, keeping the skin hydrated and plump.

Final Verdict: This has become my go-to “emergency” cream for whenever my skin feels a bit sensitized. It’s simple, it’s cooling, and it works! It’s amazing what a difference a good amount of Aloe can make. ENJOY! 😀

Aloe Cream

Q10 Antioxidant Face Cream DIY

LAB NOTES & SAFETY NOTICE
For educational purposes only. Content reflects personal, non-professional formulation experiments and is not instructional.
No formula or information on this site is intended for commercial use, consumer application, or third-party use.
Accessing this content means you accept all risks and full responsibility for safety, testing, legal compliance, and outcomes.
[Full Legal Disclaimer & Safety Requirements]

Q10 Antioxidant Face Cream DIY

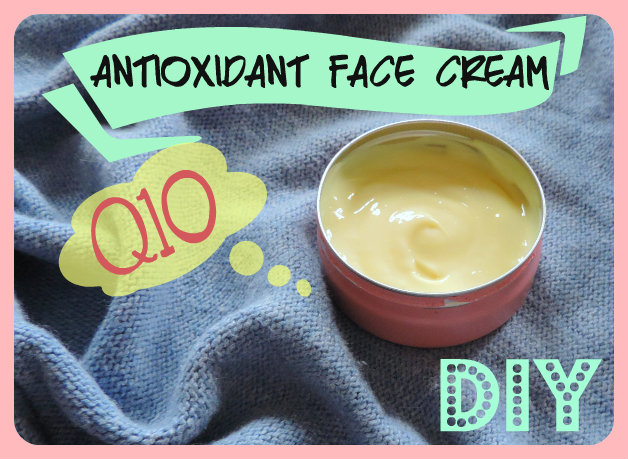
Lab Note: My “Antioxidant Network” Experiment!

Hello Hello! 😀 Today I am so excited to share an experiment that is a bit “brainy” but so cool! I call it the Antioxidant Network. Usually, we just pick one “hero” ingredient like Vitamin C, but I wanted to try something different. I wanted to build a team!

The idea is the Redox Theory—it’s like a relay race for your skin. When one antioxidant gets “tired” from fighting free radicals, the others step in to “recharge” it so the whole system keeps working. It’s synergy in a jar! yeheee! 😀

The Team Members:

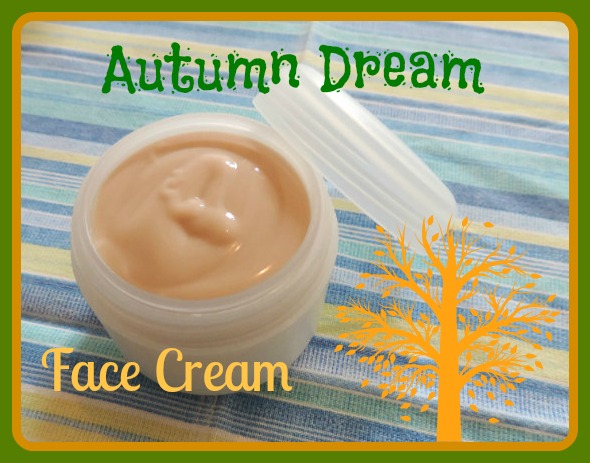
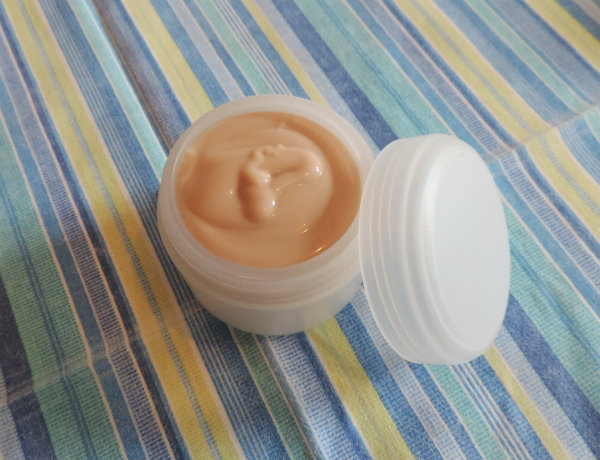
  • Coenzyme Q10: The energy booster! It gives the cream a lovely yellow tint.

  • SAP (Vitamin C): I used Sodium Ascorbyl Phosphate because it’s way less “grumpy” and irritating than pure Vitamin C.

  • Alpha-Lipoic Acid (0.5%): The “Universal” antioxidant. Warning: This stuff has a “Hell-Smell” of its own—it’s very sulfuric! I only used 0.5% because I wanted the benefits without smelling like a matchstick factory. 😛

  • Vitamin E: To protect the oils and the skin’s lipids.

The Emulsifier “Fuss”: Hitecream 3000

I played with Hitecream 3000 for this one. It’s a vegetable, protein-based emulsifier that’s supposed to be super skin-compatible. I used it at 7% on its own. It gave a stable cream, but next time I might drop it to 5% and add a bit of Cetyl Alcohol to make the texture feel a bit more “posh.”

The Formula I Used:

Phase A:

  • Distilled Water: to 100

  • Glycerin: 2.0

  • Carbopol Ultrez 21 / Xanthan: 0.3 / 0.2 (My hybrid gelling system!)

Phase B:

  • Hitecream 3000: 7.0

  • Kokum & Murumuru Butters: 1.5 / 1.0 (Love my dry butters!)

  • Dicaprylyl Ether: 1.5

  • Tocopherol (Vitamin E): 1.0

Phase C (The Antioxidant Cold Phase):

  • Safflower & Ribes Nigrum Oils: 0.5 / 0.5

  • Q10 / Alpha-Lipoic Acid: 0.1 / 0.5

Phase D (The Finishing Touch):

  • SAP (Vitamin C): 1.0

  • Rose Water: 10.0 (To dissolve the SAP)

  • D-Panthenol / Preservative: 1.0 / q.s.


Notes from my Beaker:

  1. The “No-Stir” Trick: For the Carbopol Ultrez 21, I just let it float on the water until it hydrated itself. No clumps, no stress! Then I added my Xanthan-Glycerin slurry.

  2. Heat it Up: Hitecream needs to hit 70°C to wake up and start working.

  3. The Cooling Phase: I was very careful here. I pre-dispersed the Q10 and that stinky Alpha-Lipoic acid in the cold oils (Phase C) and only added them when the cream was cool. I also dissolved the SAP in Rose Water before stirring it in.

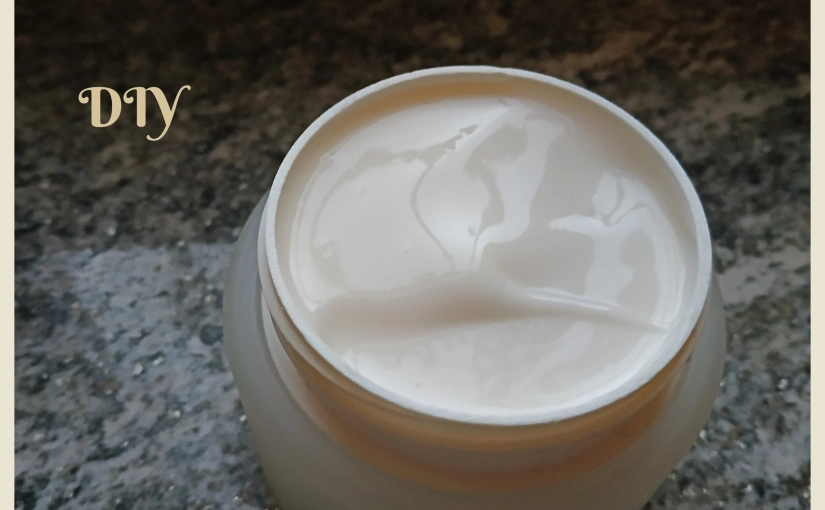
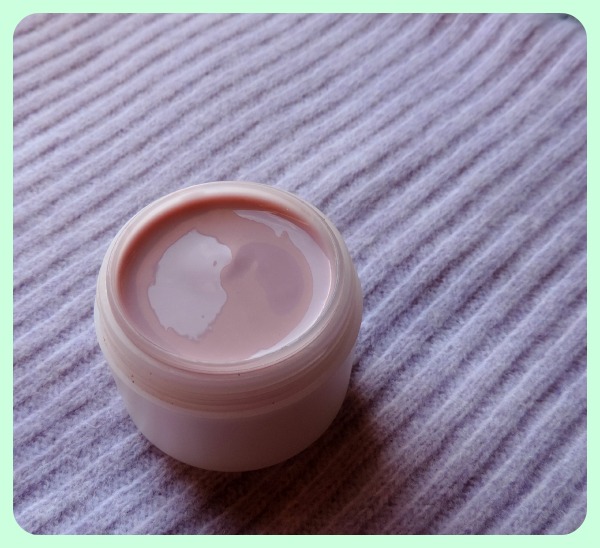
  4. The Look: The Q10 makes it a pale yellow, but I added one drop of food colorant just to make it look “fresh” and pretty on my vanity.

Final Verdict: The synergy between the SAP and the Q10 really made my skin look vibrant! Even with the slight “sulfur” hint from the Alpha-Lipoic acid, I really liked how this cream performed. It feels like a high-tech shield for the face! ENJOY! 🙂

Caffeine & Escin Eye Cream DIY

LAB NOTES & SAFETY NOTICE
For educational purposes only. Content reflects personal, non-professional formulation experiments and is not instructional.
No formula or information on this site is intended for commercial use, consumer application, or third-party use.
Accessing this content means you accept all risks and full responsibility for safety, testing, legal compliance, and outcomes.
[Full Legal Disclaimer & Safety Requirements]

Escin and Caffeine Eye Cream

Lab Note: My “Dusty” Escin Eye Cream Experiment

Hello Hello! 😀 Today I’m looking back at a formula that required a very steady hand and a bit of patience. I wanted to create a treatment specifically for the delicate eye area, focusing on puffiness and those tired mornings. yeheee!

The star of this experiment was Escin (the active from Horse Chestnut). If you’ve worked with it, you know it’s a very fine, “dusty” powder that can be a bit of a diva to incorporate. But it’s so worth it for its ability to support microcirculation! I also included Caffeine to give the skin a little “wake-up call.”

The Formula I Used:

Phase A:

  • Distilled Water: to 100

  • Glycerin: 2.0

  • Caffeine: 0.5 (I dissolved this in the hot water phase)

  • Xanthan Gum: 0.2

Phase B (The Light Lipid Phase):

  • Methyl Glucose Sesquistearate: 3.0 (My reliable emulsifier)

  • Cetyl Alcohol: 1.0 (Just a little for stability)

  • Argan Oil: 3.0 (Rich in Vitamin E but not too heavy)

  • Rice Bran Oil: 2.0

  • Shea Butter: 0.5 (Just a tiny touch for creaminess)

Phase C (The Active Cold Phase):

  • Escin: 1.0 (The “dusty” hero!)

  • Cornflower Water (Hydrolat): 10.0 (Soothing for the eyes)

  • D-Panthenol: 1.0

  • Tocopherol (Vitamin E): 0.5

  • Preservative: (According to my usual lab choice)


Notes from my Beaker:

  1. The Caffeine Trick: I made sure to add the Caffeine to Phase A while the water was hot. It dissolves much better that way, so you don’t end up with any “crunchy” bits in your eye cream!

  2. Handling the Escin: This was the trickiest part. Escin is very light and dusty. I found that pre-mixing it with the Cornflower Water in Phase C to create a smooth slurry made it much easier to fold into the emulsion without it flying everywhere!

  3. The Texture: Because it’s for the eyes, I wanted it to be light. The combination of Argan and Rice Bran oil makes it sink in quickly so it doesn’t mess up my concealer later.

  4. pH is Critical: For the eye area, I was extremely careful to check the pH. I kept it right at 6.0 to 6.5. Our eyes are much more sensitive to acidity than the rest of our face, so “neutral” is the way to go here.

Final Verdict: I’ve been using this in the mornings, and I really notice a difference in how “awake” my eyes look. The Escin and Caffeine duo is like a double espresso for the face! It’s a bit of a “picky” formula to make, but the results are so elegant. ENJOY! 😀

Escin and Caffeine Eye Cream14

Babassu Body Cream – Recipe

LAB NOTES & SAFETY NOTICE
For educational purposes only. Content reflects personal, non-professional formulation experiments and is not instructional.
No formula or information on this site is intended for commercial use, consumer application, or third-party use.
Accessing this content means you accept all risks and full responsibility for safety, testing, legal compliance, and outcomes.
[Full Legal Disclaimer & Safety Requirements]

Hello there! 😀

Babassu Body Cream

Lab Note: My “Smooth as Silk” Babassu & Shea Body Cream

Today I’m sharing a recipe for a rich body cream using a new emulsifier: Methyl Glucose Distearate. I’ve found the skin feel is even lighter than the “Sesquistearate” version, so I might start testing this for face creams too! yeheee!

For this body cream, I wanted it to feel luxurious but not greasy, so I chose Babassu Oil and Shea Butter, but balanced them with Dicaprylyl Ether to give it a nice “dry” finish.

The “Secret” Allantoin Trick:

I add Allantoin to almost everything because it’s so soothing and affordable. But it can be tricky to disperse! My secret? I found that it “melts” perfectly into Hydrolyzed Proteins. Now, I always pair them together in my Phase C—no more grainy creams! 😉

The Formula I Used:

Phase A (The Gel Base):

  • Water: to 100

  • Glycerin: 5.0

  • Xanthan Gum: 0.2

  • Carbopol Ultrez 21: 0.4 (The “No-Stir” superstar!)

Phase B (The Precious Fats):

  • Methyl Glucose Distearate: 3.5 (The new emulsifier)

  • Cetyl Alcohol / Cetyl Palmitate: 0.8 / 0.7 (My thickening duo)

  • Shea Butter: 6.0

  • Babassu Oil: 8.0

  • Rose Hip Oil: 3.0

  • Dicaprylyl Ether: 3.0 (For that “dry” touch)

Phase C (The Active Finish):

  • Hydrolyzed Oat Proteins: 3.0

  • Allantoin: 0.4 (Pre-mixed into the proteins!)

  • Preservative (Cosgard): 1.0

  • Fragrance Oil: A few drops


Notes from my Beaker:

  1. The Carbopol Ritual: I measured the Carbopol Ultrez 21 and just poured it on top of the water. Do not mix it! Just let it sit and hydrate slowly while it sits on the surface. After a few minutes, it looks like water with little whitish pieces—that’s perfect! It only becomes a gel once the pH hits 5.

  2. The Emulsion: I heated Phase A and B to 70°C. I added the Xanthan-glycerin slurry to the water just before mixing. Then, I slowly poured Phase B into Phase A while stirring with a spatula.

  3. The Mixer: Once they are combined, it’s time for the immersion mixer! It turns white and liquid, but the mixer is what makes the “magic” emulsification happen.

  4. The Ice Bath: You cannot skip the cooling process or it might separate! I used an ice bath to speed things up, stirring for about 30 minutes until it reached room temperature.

  5. The Finish: I added my Phase C (with my Allantoin-Protein mix!), checked the pH, and adjusted it to 5.5.

  6. The Waiting Game: Because of the Cetyl Alcohol and Palmitate, the cream keeps thickening for 24-48 hours. I left it in the beaker covered with plastic wrap for two days, stirring it every now and then, before finally putting it into jars.

Final Verdict: The texture is lovely! It’s rich because of the Shea and Babassu, but the new emulsifier and the Dicaprylyl Ether keep it from feeling “heavy.” And thanks to the protein trick, the Allantoin is perfectly smooth. ENJOY! 😀 😀 😀

Body cream itsallinmyhands


Autumn Dream – Face Cream

LAB NOTES & SAFETY NOTICE
For educational purposes only. Content reflects personal, non-professional formulation experiments and is not instructional.
No formula or information on this site is intended for commercial use, consumer application, or third-party use.
Accessing this content means you accept all risks and full responsibility for safety, testing, legal compliance, and outcomes.
[Full Legal Disclaimer & Safety Requirements]

Autumn Cream 13

Lab Note: My “Autumn Dream” Face Cream

Hello Hello! 😀 I finally have the recipe and pictures for the autumn cream I’m using right now. I call it my “Poetry” cream because I was feeling a bit artistic when I made it—but also because my sensitive skin needs something truly soothing as soon as the first cold weather hits.

This cream has a higher percentage of fats than my summer formulas, plus a “bouquet” of active ingredients specifically chosen to protect capillaries and calm redness. yeheee!

The Formula: 

Phase A (The Gel):

  • Water: to 100

  • Glycerin: 3.0

  • Xanthan Gum: 0.2 (I usually prefer a mix with Carbomer, but mine expired! Xanthan alone still works, though the finish is slightly different.)

Phase B (The Emulsion):

  • Murumuru Butter: 0.5 (Dry skin: 2.5)

  • Safflower Oil: 0.5 (Dry skin: 2.5)

  • Methyl Glucose Sesquistearate: 3.0 (Emulsifier)

  • Cetyl Palmitate: 1.0 (For a soft cream feel)

  • Tocopherol (Vitamin E): 0.5

  • Propylheptyl Caprylate: 1.5 (For a super light skin feel)

Phase C (The Soothing Actives):

  • Oily Part: Bisabolol (0.5), Black Currant Oil (1.0), Dry Flo (0.5)

  • Water Part: Hydrolyzed Silk Proteins (2.0), Allantoin (0.4), Water (5.0)

  • Botanical Extracts: Vitis Vinifera (0.2), Raspberry (0.1), Licorice/Glycyrrhizic Acid (0.2)

  • Hydration: Hyaluronic Acid Gel (5.0)

  • Preservative: Cosgard (1.0)


Notes from my Beaker:

  1. Extract Colors: Just a warning—plant extracts like Licorice and Vitis Vinifera are NOT white! They will change the color of your cream to a more “earthy” tone, but the soothing benefits are worth it!

  2. The Allantoin Trick: As always, I mix the Allantoin into the Silk Proteins first. It disperses so much better this way—no crystals!

  3. The Process: I heated Phase A and B to 70°C. I poured B into A slowly while stirring by hand, then hit it with the immersion mixer. It turns bright white immediately!

  4. The Cooling Phase: This part is very important. I kept stirring with a spatula until it reached room temperature. While it’s hot, it looks very liquid—don’t panic! The Cetyl Palmitate only thickens as it cools (and continues for a few days).

  5. The Final Touch: Once cool, I added the two Phase C parts, checked the pH (it hit 5.5 perfectly), and gave it one last quick pulse with the mixer to make it perfectly smooth.

Final Verdict: This is a lifesaver for winter. The Black Currant oil and Licorice extract really help my capillaries survive the cold stress. It might not stay pure white because of the extracts, but it feels like a dream on the skin. ENJOY! 😀 😀 😀

Autumn Cream 11