Soap soap soap… decoration!

Violet Soap 2

LAB NOTES & SAFETY NOTICE
These are personal experiments for educational use only—not for commercial or consumer use. By proceeding, you assume all risks related to safety, testing, and regulatory compliance.
[Full Legal Disclaimer & Safety Requirements]

300 gr Coconut oil
400 gr Olive oil
150 gr Shea butter
50 gr Castor oil
50 gr Cocoa butter
50 gr Almond oil 

147 gr lye
330 water

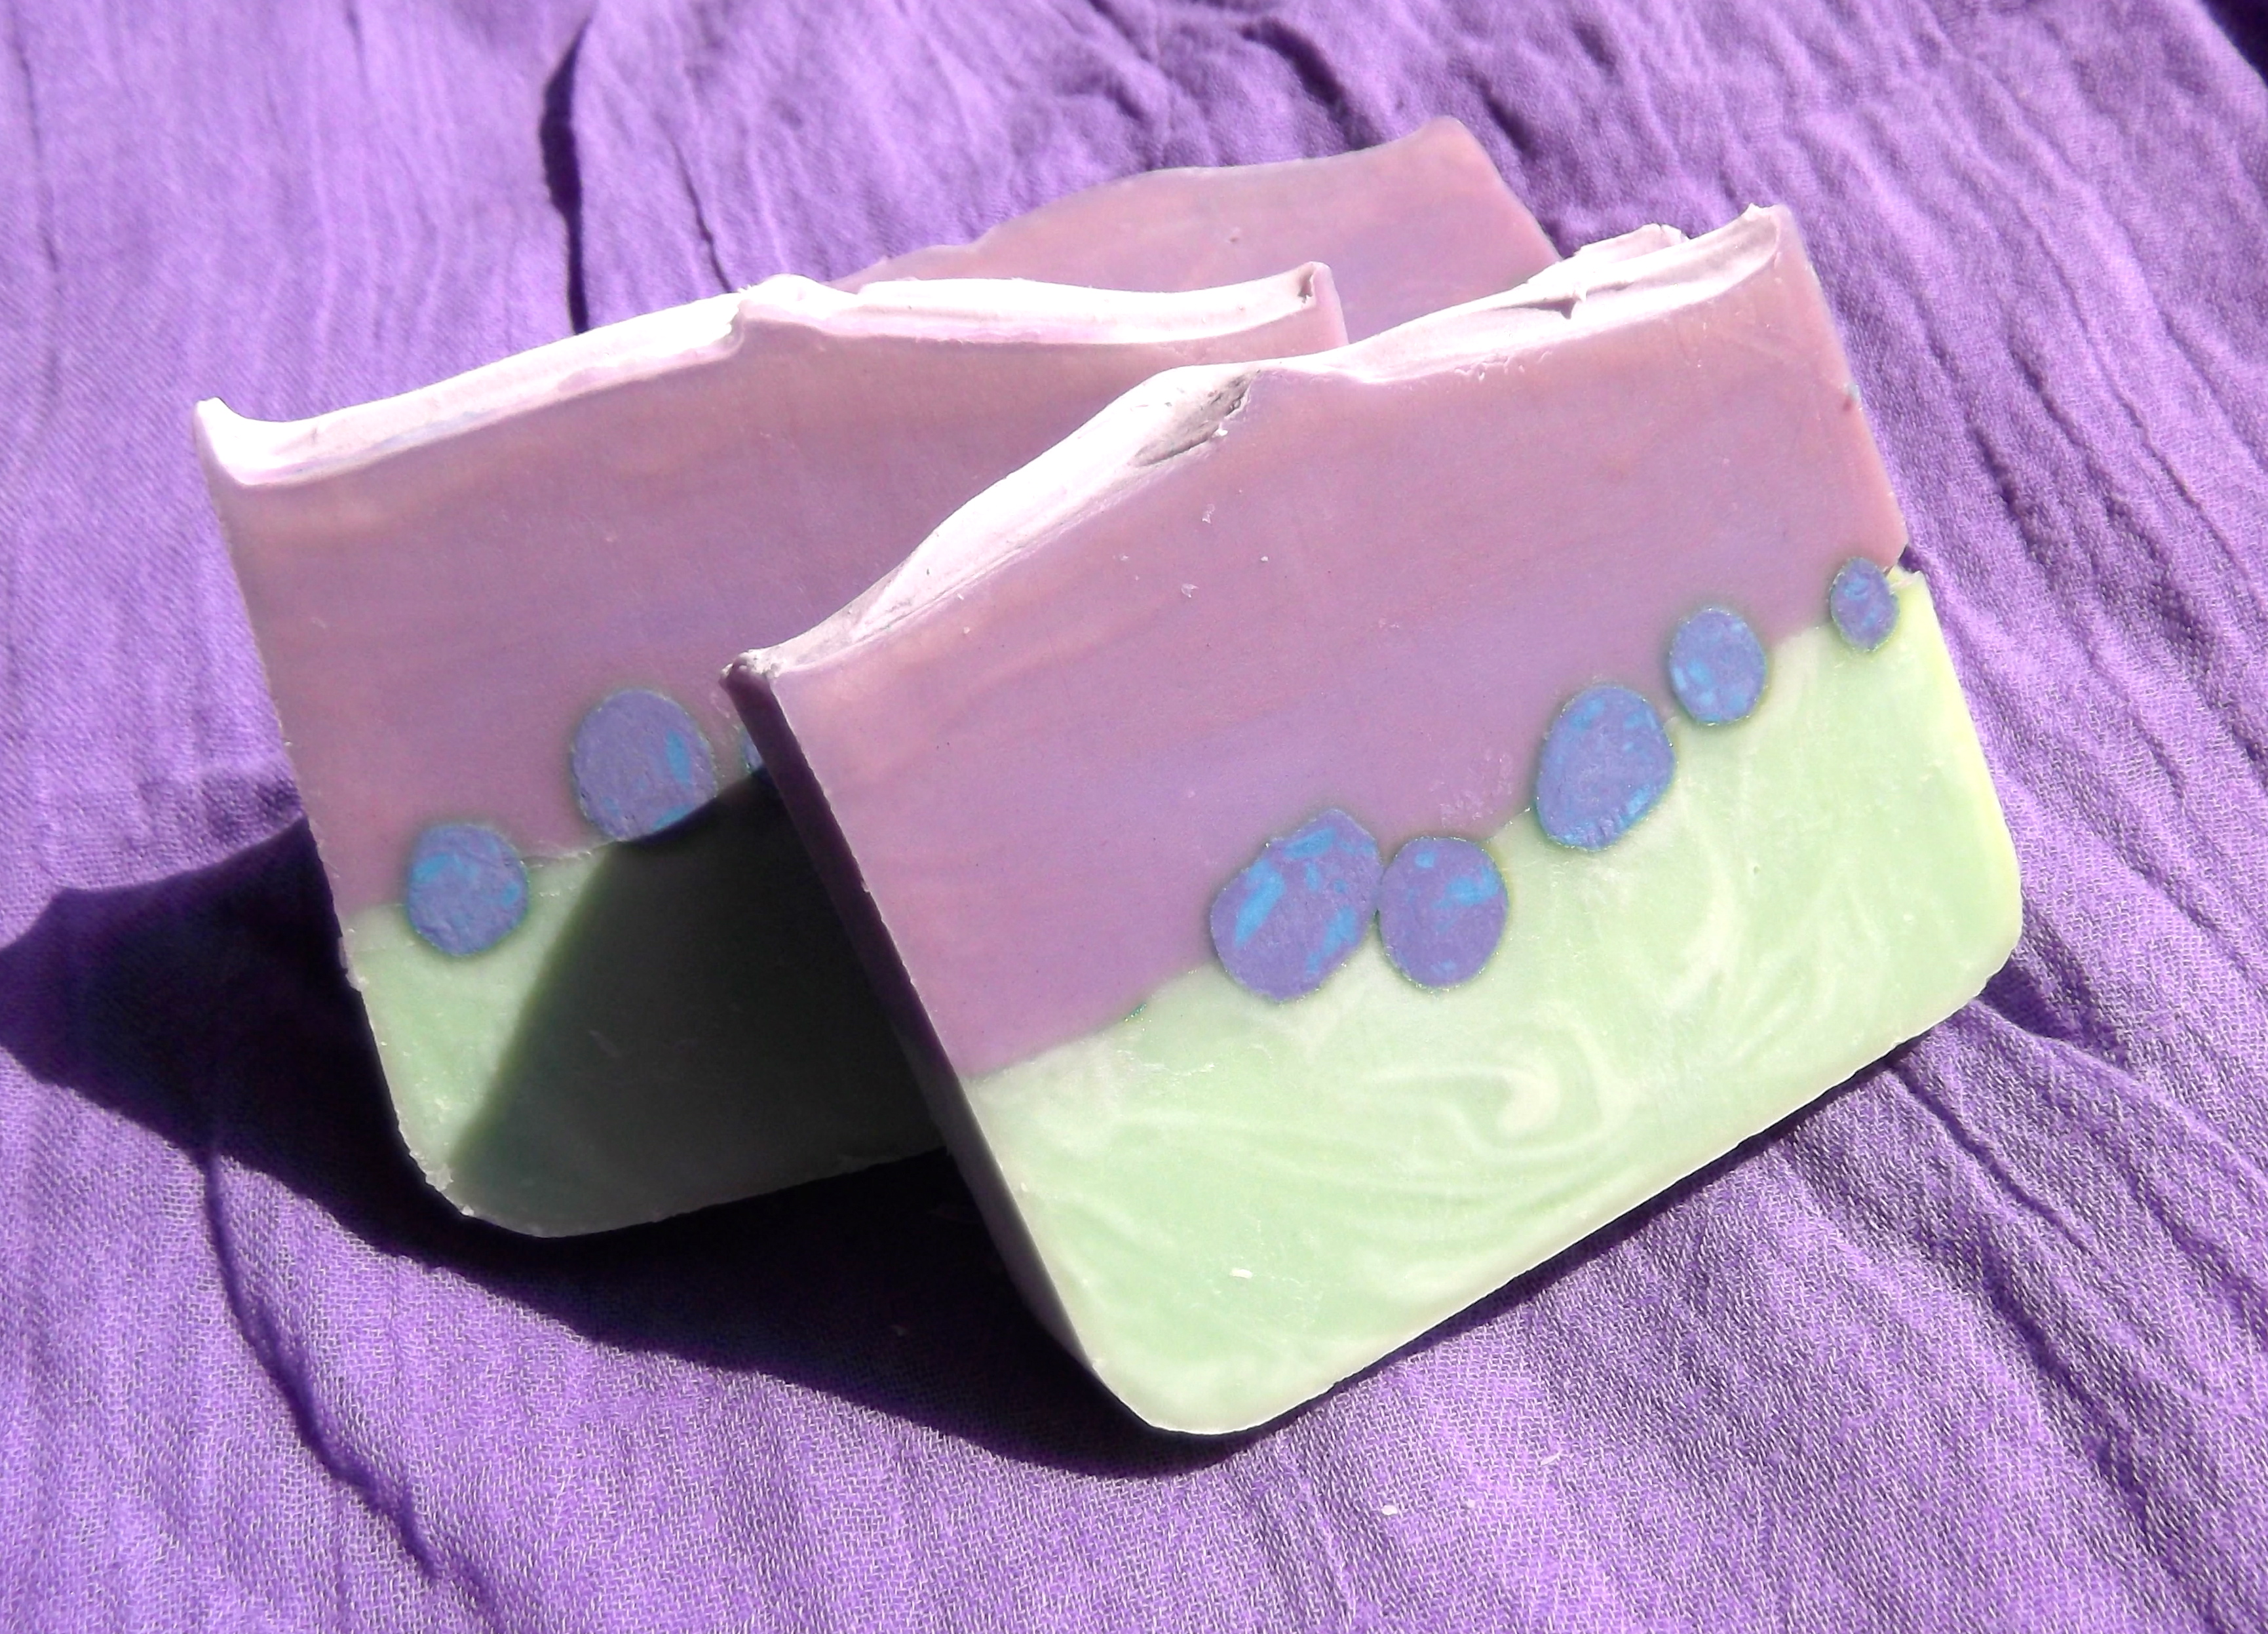
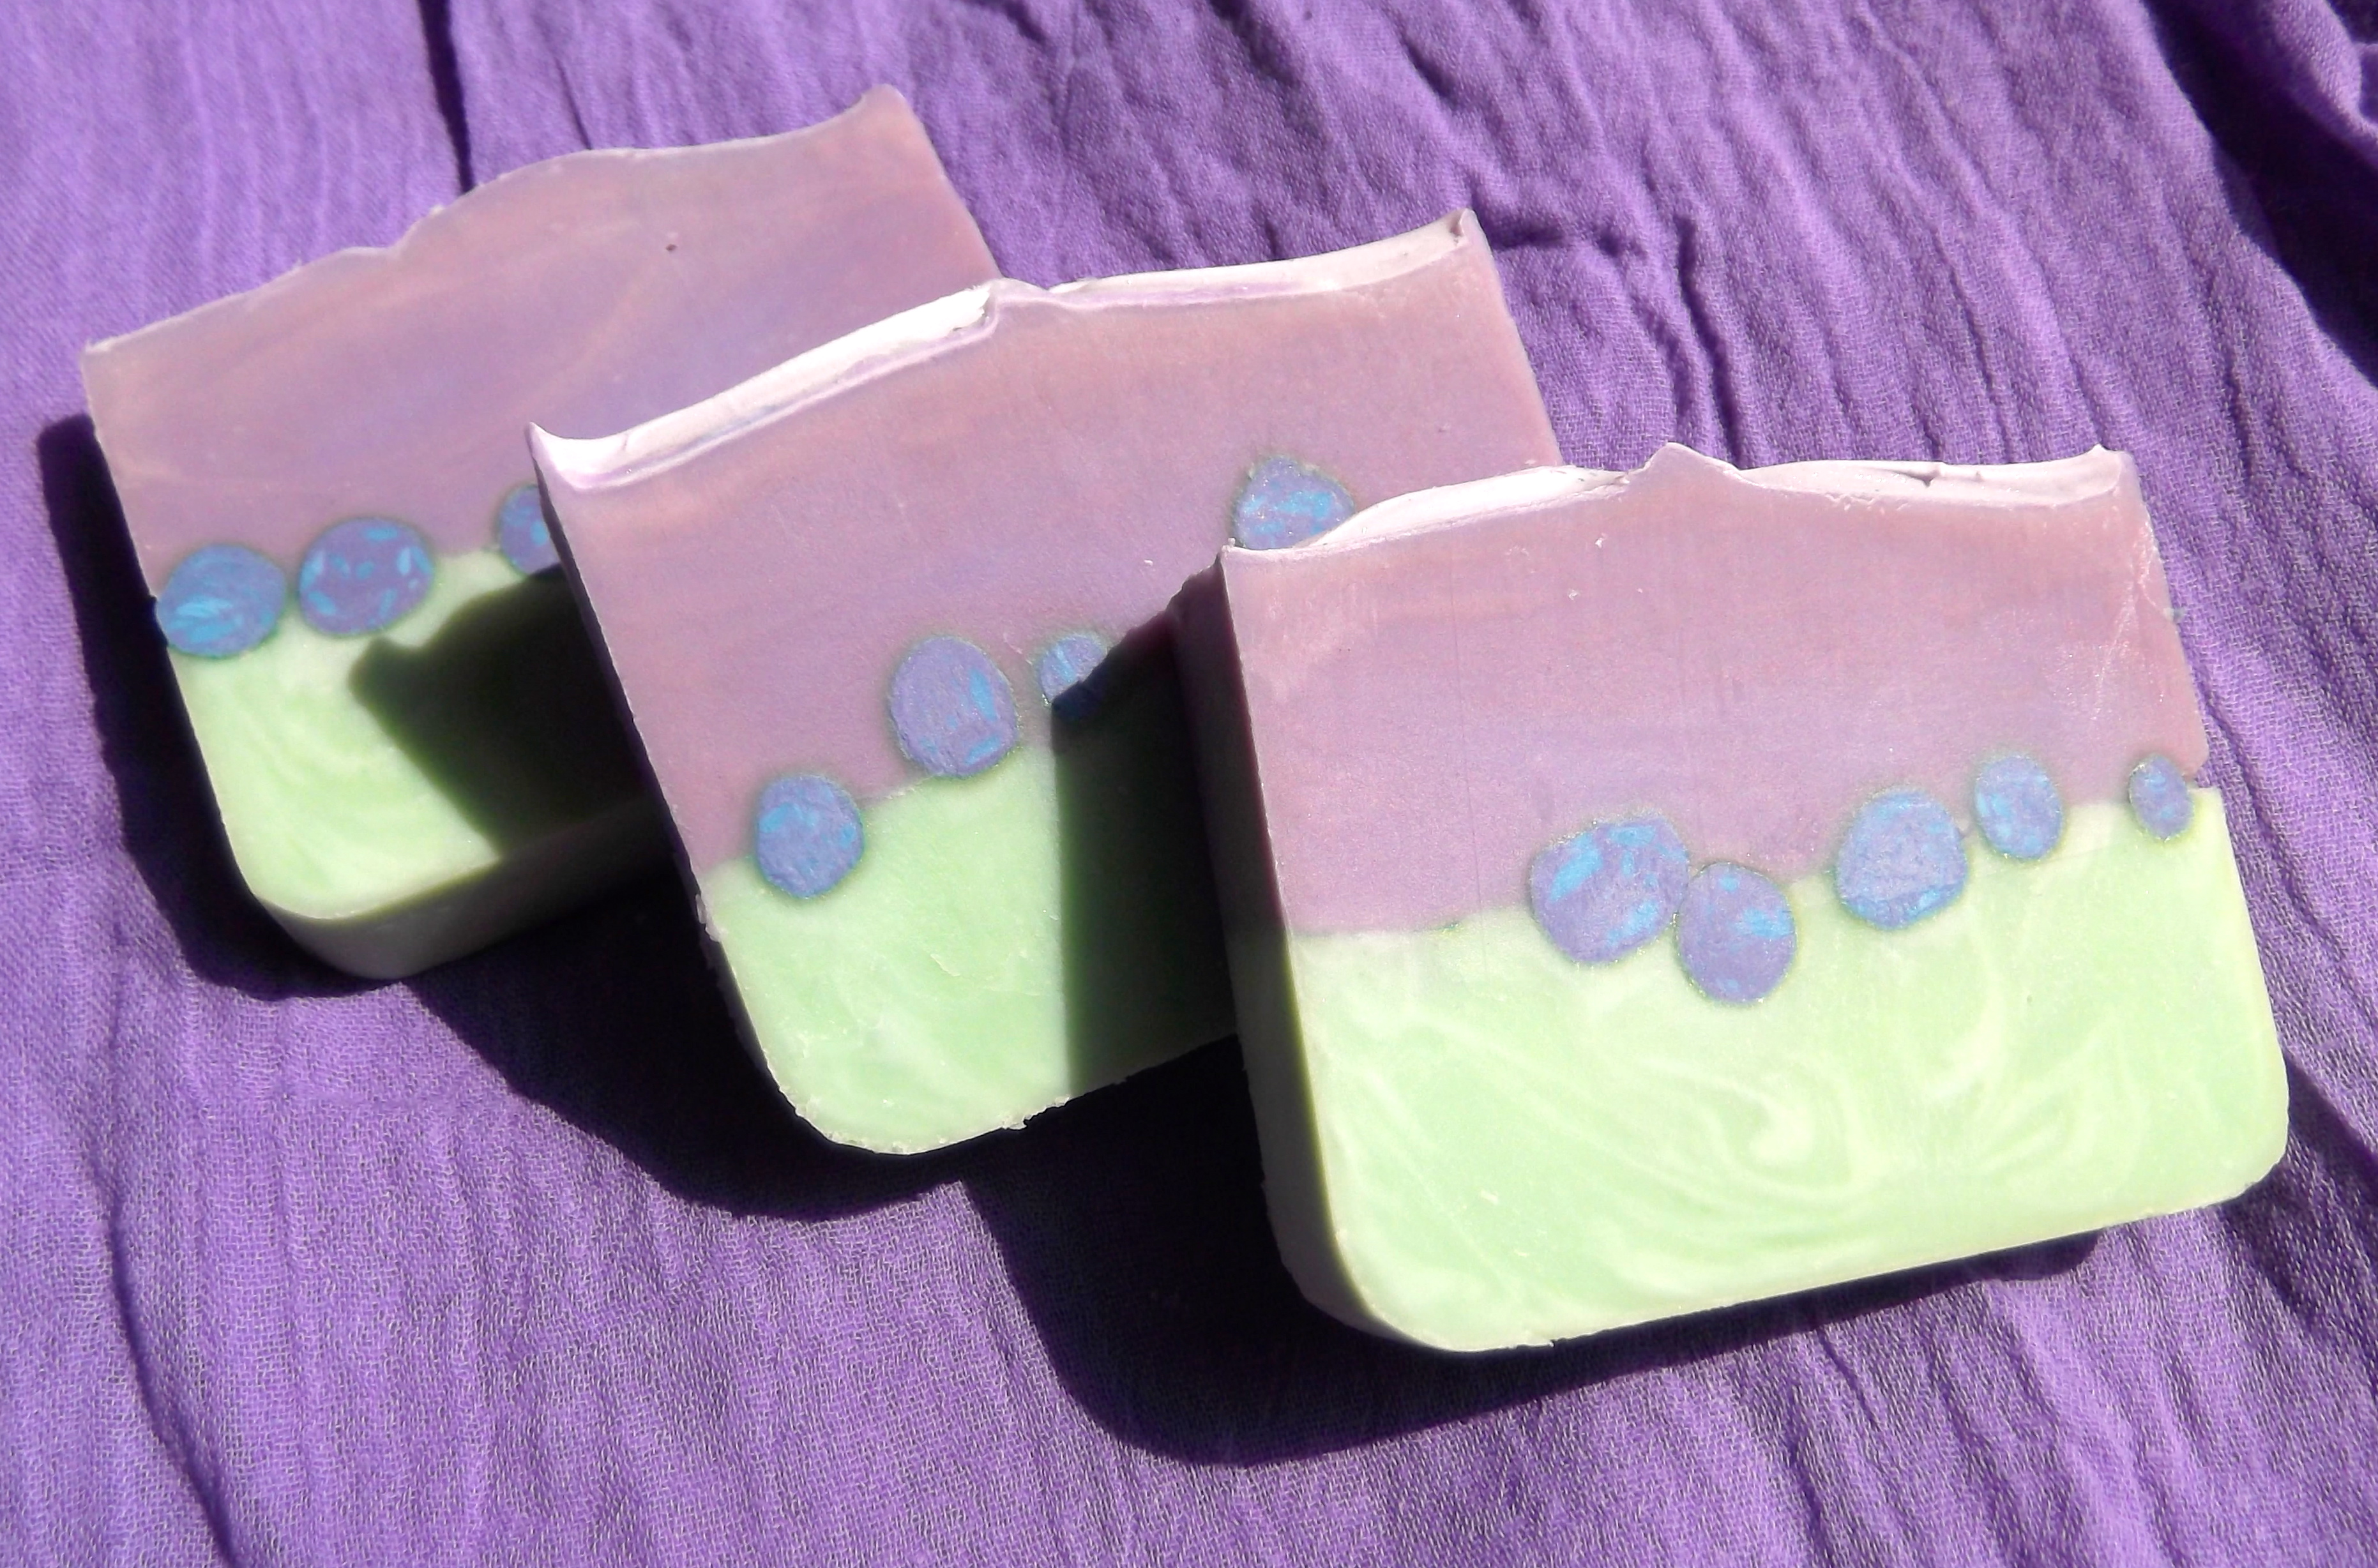
but what I love of this soap is actually the decoration! 😀

I colored all the paste of violet, using a specific colorant for cold process soaps (but if you have micas you might want to try with that! BUT some micas do not keep their color in saponification: what you can do is drop some mica inside a small amount of water and lye just to see if the color changes in a strong alcaline environment – like soap is going to be – if the color stays same… you can use it to color your soaps! Yay! 😀 ).

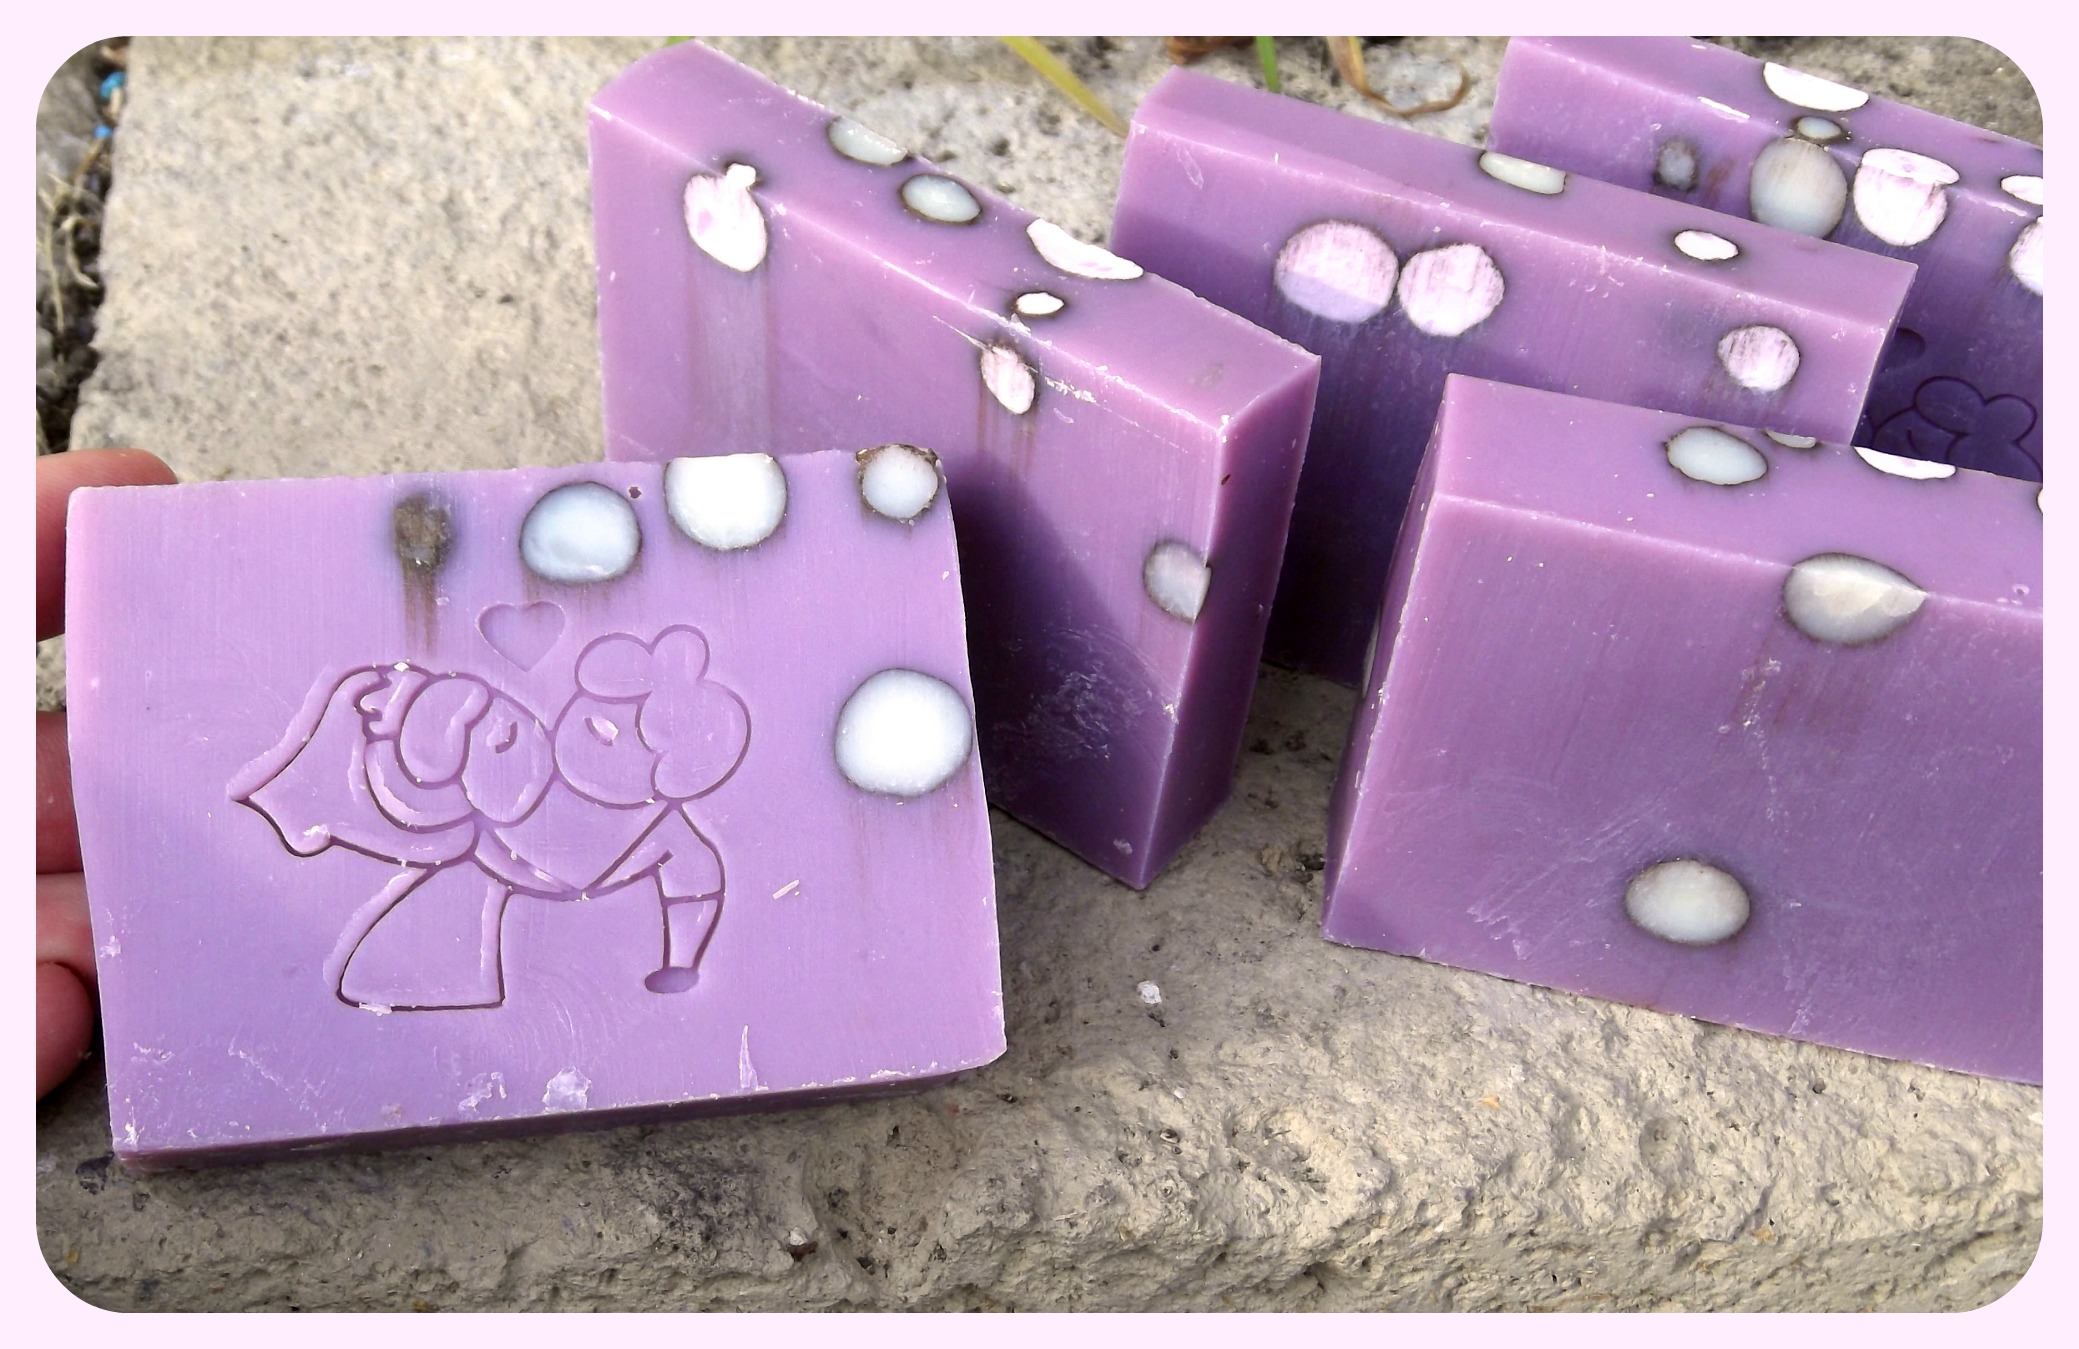
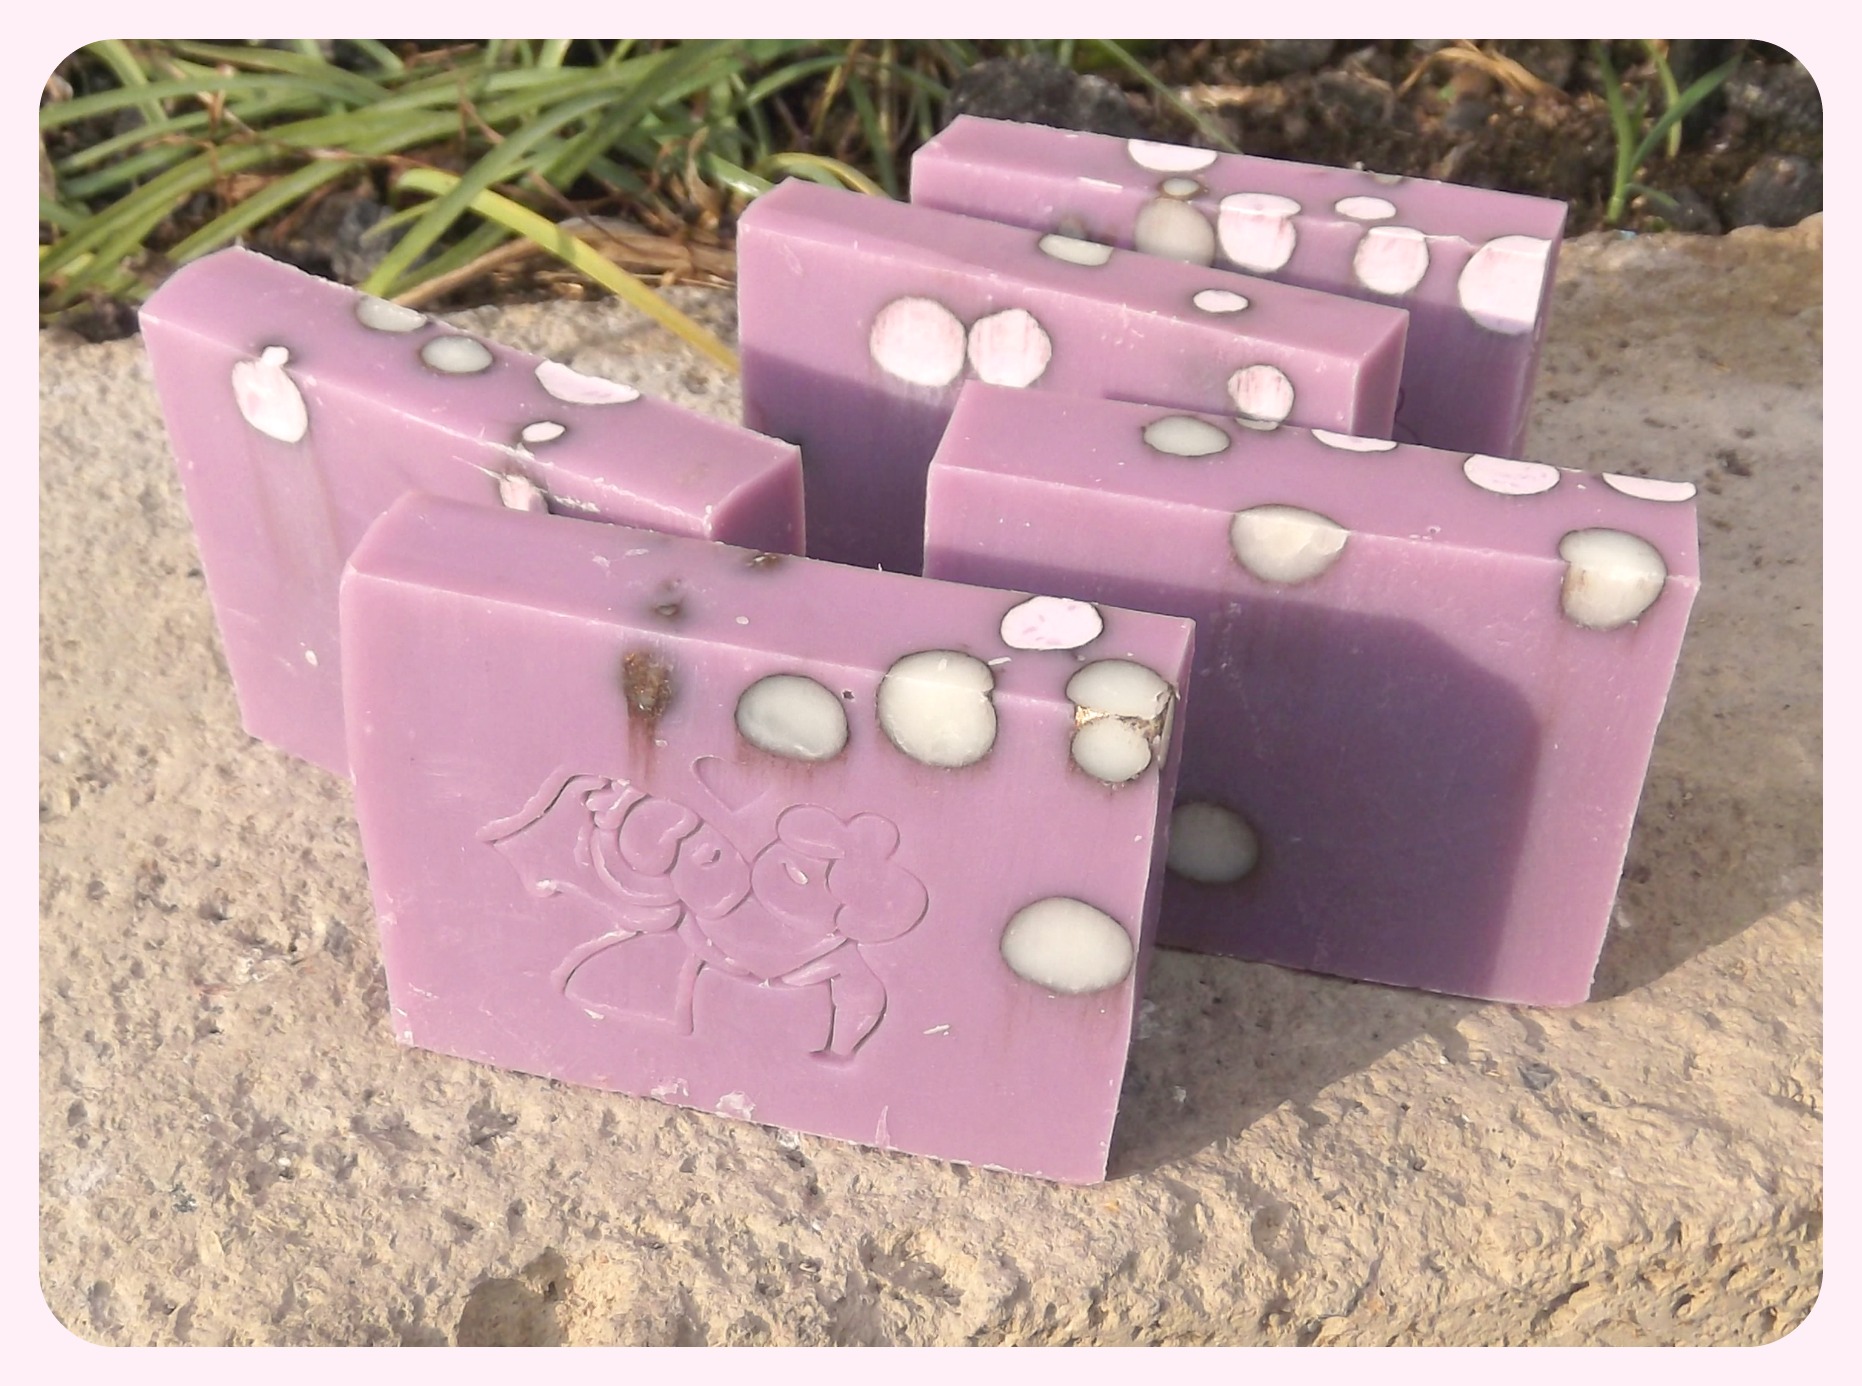
Then I had some fresh leftovers of another soap which was white in color: I cut very small cubes and, using gloves, I rolled each cube in my hands to make it become a small ball! 😀
I also colored some paste with another drop of violet and that’s why some balls look more pinkish!

Eventually I collected all the little soap balls and poured on them a dark copper Mica! I mixed lightly until all were covered and simply dropped them in my soap (which was at a quite thick trace!). As you can see the result is a little dark mark around each ball! 😀

Hope you like this!
I loved the result! 😀

Have a great day!

[ps. as you can see I still haven’t got the hang on stamping soaps… but I will 😀 sooner or later 😀 ahahah]

Violet Soap

For more recipes click HERE 
To learn how to formulate cosmetics click HERE
For a list of online cosmetic ingredients suppliers click HERE 

Creative Commons License
This work is licensed under a Creative Commons Attribution-NonCommercial-NoDerivatives 4.0 International License.

DIY Karma Shampoo (extra delicate!) & chat on betaine

LAB NOTES & SAFETY NOTICE
These are personal experiments for educational use only—not for commercial or consumer use. By proceeding, you assume all risks related to safety, testing, and regulatory compliance.
[Full Legal Disclaimer & Safety Requirements]

Hello everyone! 😀

Make your own Karma Shampoo

Hello Hello! 😀 Today I’m sharing my experiment with a formula that is all about finding the perfect “Karma” for my hair. I know I’ve been experimenting with a lot of sulfate-free stuff lately, but sometimes you just want that really deep, satisfying clean that only SLES can give—especially if you’ve been using a lot of hairspray or if your hair just feels “heavy.”

The challenge I set for myself was: Can I use SLES but make it feel like a high-end, expensive boutique shampoo instead of something harsh?

The secret is all in the TMG (Trimethylglycine). (Trimethylglycine). I didn’t just want bubbles; I wanted protection. TMG is an anhydrous betaine that is a total powerhouse for hydration. Adding it to a SLES base is a game-changer because it helps protect the scalp and hair from the drying effects of the surfactants. It’s like giving your hair a big drink of water while you clean it!

The Formula

Phase A:

  • Water: to 100

  • Glycerin: 3

  • Guar Hydroxypropyltrimonium Chloride: 0.2

Phase B:

  • Sodium Laureth Sulfate (SLES): 25

  • Cocamidopropyl Betaine: 10

  • Coco-Glucoside: 5

  • TMG (Trimethylglycine): 3

Phase C:

  • Hydrolyzed Wheat Protein: 1

  • Panthenol: 0.5

  • Preservative: (According to my usual lab choice)

  • Fragrance Oil: (Karma type scent)

  • Citric Acid: (To reach pH 5.5)

  • Salt (Sodium Chloride): (A pinch to thicken)

My notes from the experiment:

The best part was watching the texture change. When I started adding the Citric Acid to bring the pH down to 5.5, and then just a tiny pinch of salt at the very end, the shampoo turned into this gorgeous, thick “honey” consistency. It’s so satisfying to pour!

The result is exactly what I wanted. You get those huge, fluffy bubbles that everyone loves, but when you rinse it off, your hair doesn’t feel like “straw.” It feels clean, bouncy, and smells like a L**h dupe 😀 . It just goes to show that with the right balance, even the “strong” ingredients can have great Karma! ENJOY! 😀

Banana Smoothie – Hair Conditioner (with Cetrimonium Chloride)

Bananasmoothie2

LAB NOTES & SAFETY NOTICE
These are personal experiments for educational use only—not for commercial or consumer use. By proceeding, you assume all risks related to safety, testing, and regulatory compliance.
[Full Legal Disclaimer & Safety Requirements]

Lab Note: My “Banana Smoothie” Hair Conditioner

Hello Hello Everyone! 😀 I know I just posted a hair conditioner recipe recently, but I am way too excited about this one to wait!

In my last experiment, I used an eco-friendly emulsifier that was good, but it needed so many thickeners that I had to put it in a pot. This one is different. This is my Banana Smoothie—it’s creamy, but not too thick, so it actually pours into a bottle!

The star of the show? Mr. Cetrimonium Chloride! 😀 It is an amazing conditioner. It’s a “beast” at detangling (even though the cream itself is soft), and the effect lasts as long as it’s on your hair.

The Formula for my Smoothie:

Phase A:

  • Water to 100
  • Glycerin 2
  • Cetrimonium Chloride 4 (I have long, thin hair that knots if I just look at it, so I used 4% and it works amazingly!)

Phase B:

  • Cetearyl Alcohol 2 (This is the thickener. I only used 2% to keep it pourable. If you wanted a pot-cream, you’d go up to 5%!)
  • Shea Butter 0.5
  • Dicaprylyl Ether 0.5 (A very light synthetic oil)
  • Jojoba Oil 0.5 (Technically a wax—it never goes rancid!)

Phase C:

  • Wheat Proteins Powder 0.5
  • Polyquaternium 7 – 1
  • Quaternium 80 – 0.5 (These are extra conditioners, but Cetrimonium is so strong you could even omit these!)
  • Preservative (According to the type used)
  • Fragrance Oil (I used BANANA—hence the name! :D)
  • Citric Acid (To reach pH 4.5—you MUST add this!)

Notes from the Beaker:

  1. Heat it up: I heated both Phase A and Phase B to 70°C.
  2. The Golden Rule: For conditioners, it’s different! Phase A (Water) MUST be poured into Phase B (Oils). Not the other way around! Very important! 😀
  3. Mixing: I used the immersion mixer until it looked smooth, then stirred slowly by hand until it cooled down.
  4. One by One: I added the Phase C ingredients at the end, but I added them one by one. If you dump them all in, the texture can get cranky.
  5. The Oil Choice: I used Jojoba and a synthetic oil because they don’t go rancid. Since conditioner stays on the hair a bit, you don’t want oils that smell bad after a while!

Final Verdict: I am really satisfied! It smells like bananas, detangles like a dream, and actually fits in my squeeze bottles. I love it! 😀

Pink Sugar Frosting Body Lotion (Recipe)

LAB NOTES & SAFETY NOTICE
These are personal experiments for educational use only— not instructions and not for commercial or consumer use. By proceeding, you assume all risks related to safety, testing, and regulatory compliance.
[Full Legal Disclaimer & Safety Requirements]

DSCF3571

Silk-Touch Body Cream

Hello Hello! 😀 My goal for this one was to make a super emollient cream—the kind that feels really luxurious on the skin. I didn’t want to pack it with a million actives; I just wanted it to do good for the body! We spend so much time on our faces, but our body skin deserves some love too, right? 😉

The “Grease-Fall” (My Oil Selection):

Since this is for the body, I wasn’t worried about oils being comedogenic. I used 5% Shea Butter (which is comedogenic, whatever you read online! :P) because it is absolute heaven for body skin.

For the rest, I created a “Grease-Fall” using light and extra light oils. Most of these are synthetic or waxes (like Jojoba) because they make the cream feel so much better on the skin. If you want only natural oils, it won’t feel quite as silky, but Jojoba gets you pretty close!

The Formula:

Phase A:

  • Water to 100

  • Glycerin 5

  • Carbopol Ultrez 21 – 0.1 (A little gelling agent to keep it bouncy!)

Phase B (The “No-Heat” Emulsifier):

  • Abil Care 85 – 2 (This is a silicone-based emulsifier. I don’t use it on my face because it gives me tiny pimples, but for the body? I totally enjoy it! It makes the cream velvety and it’s almost impossible to fail with it! :D)

  • Tinovis ADE – 1.5 (This is the thickener/gel maker that works at room temperature—no heating needed, yeheee!)

  • Shea Butter – 5

  • Safflower Oil – 3

  • Borage Oil – 3

  • Jojoba Oil – 5

  • Dicaprylyl Ether – 5 (Extra light synthetic oil)

  • Cetiol Sensoft – 5 (The lightest oil ever—it feels like silicone but it isn’t!)

  • Tocopherol – 1 (Vitamin E)

Phase C (The Actives):

  • Allantoin – 0.35

  • Oat Hydrolyzed Proteins – 1.65 * Panthenol – 1 (Vitamin B5)

  • Preservative (The amount needed for yours!)

  • Fragrance Oil (I used “Pink Sugar” from Gracefruit… mmm! :D)


Notes from the Beaker:

  1. The Allantoin Hack: Allantoin can be a pain to dissolve—it gets gritty! But I found a trick: if you mix it with the hydrolyzed proteins first, it melts in so fast! That does the trick every time! 😀

  2. No Double Boiler: Since I used Abil Care 85 and Tinovis ADE, I didn’t have to heat anything up! It’s a fast way to get a professional texture.

  3. Mixing: I just poured Phase A into Phase B and mixed. It gets thick and silky almost instantly.

  4. Substitution Note: If you swap the emulsifier for one that does need heat, you have to move the Tinovis to Phase C because it hates heat!

Final Verdict: I am so satisfied with the “Silk-Touch” on this one. It’s emollient without being a sticky mess. ENJOY!!! 😀

Sebum Normalizer cream Recipe

DSCF3535

LAB NOTES & SAFETY NOTICE
These are personal experiments for educational use only— not instructions and not for commercial or consumer use. By proceeding, you assume all risks related to safety, testing, and regulatory compliance.
[Full Legal Disclaimer & Safety Requirements]

Lab Note: The “Oil-Control” Spring Fluid

Hello Hello! 😀 With the spring days finally arriving, I wanted to formulate something light. This cream is specifically designed for oily skin that needs hydration without the weight. In fact, the oil percentage is so low it’s almost an “oil-free” cream!

The Oil-Control Duo:

  • Azeloglicine (6%): Pure Azelaic Acid is a nightmare to work with at home because it won’t dissolve in water or oil. Bingo! Azeloglicine is the answer. It’s a hydrophilic derivative that kills acne-causing bacteria and normalizes sebum.

  • Tiolisine Complex (2.5%): A sulfurated amino acid derivative that is a powerhouse for sebum-normalizing.

The Formula: Spring Oil-Control Fluid

Phase A (The Gel Base):

  • Water: to 100

  • Glycerin: 2.5

  • Xanthan Gum (Non-transparent): 0.11

  • Carbopol Ultrez 21: 0.3

Phase B (The Light Oily Phase):

  • Methyl Glucose Sesquistearate: 2.0 (Low % for a low-oil formula)

  • Cetyl Alcohol: 0.8 (Kept low to avoid a “waxy” feel)

  • Cetiol Sensoft: 1.5 (A very light synthetic oil for a smooth touch)

  • Evening Primrose Oil: 1.0

  • Hemp Oil: 0.5

  • Tocopherol (Vitamin E): 1.0

Phase C1 (The “Dry” Finish):

  • Bisabolol: 0.5 (Soothing)

  • Dry Flo: 0.7 (Aluminum Starch Octenylsuccinate—for a matte finish!)

Phase C2 (The Actives):

  • Azeloglicine: 6.0

  • Tiolisine Complex: 2.5

  • Preservative (Cosgard): 1.0

  • Adjust pH to 5.5 – 6.0


Notes from my Beaker:

  1. Consistency Matters: I intentionally made this a fluid lotion rather than a thick cream. For oily skin, thick textures can “feel” too rich or heavy. I prefer a light, milky fluid that sinks in immediately!

  2. The Wax Factor: If you want it thicker, you could raise the Cetyl Alcohol to 1.5%, but I don’t recommend it for oily skin—it can start to feel like a wax layer on your face.

  3. Active Power: Because Azeloglicine is water-soluble, it’s so much easier to incorporate into Phase C than trying to fight with pure Azelaic acid powder. It keeps the cream smooth and professional.

Final Verdict: This is my go-to when the weather gets warmer. It keeps the shine away while treating any little breakouts with the Tiolisine and Azeloglicine. It’s light, smooth, and fresh!

HAVE A GREAT DAY! 😀 😀 😀

Hair Conditioner Recipe (and THEORY)

Hair Conditioner Recipe

LAB NOTES & SAFETY NOTICE
These are personal experiments for educational use only— not instructions and not for commercial or consumer use. By proceeding, you assume all risks related to safety, testing, and regulatory compliance.
[Full Legal Disclaimer & Safety Requirements]

Theory & Practice: The Basic Hair Conditioner

Hello Hello! :D Today I want to show you a foundational recipe for a high-performance hair conditioner.

Making a conditioner is similar to making a skin lotion, but there are some critical differences in the technique. If you don’t follow these, your conditioner might fail or separate!

The Two Golden Rules of Conditioner:

  1. The Pour: In a lotion, we usually pour the Oil (B) into the Water (A). In a conditioner, you MUST pour the Water (Phase A) into the Oil (Phase B). This is vital for the cationic emulsion!

  2. Phase C: There isn’t a “block” Phase C. You must add every extra ingredient SINGULARLY, ONE BY ONE, once the emulsion is at room temperature.

The Formula: Eco-Friendly Conditioner

Phase A (Water):

  • Water: to 100

  • Glycerin: 3.0

  • Guar Hydroxypropyltrimonium Chloride: 0.1 (This is a fantastic detangler! If you don’t have it, you can use a Flaxseed or Mallow infusion instead).

  • Heat to precisely 75°C.

Phase B (The Cationic Base):

  • Esterquat: 8.0 (This is a cationic emulsifier—specifically for hair! It’s great because it’s eco-friendly).

  • Jojoba Oil: 2.0

  • Cetyl Alcohol: 3.5 (For thickness and “slip”)

  • Stearic Acid: 1.5

  • Heat to 70°C.

“Phase C” (Add one by one!):

  • Hydrolyzed Wheat Protein: 3.0

  • Panthenol: 1.0

  • Polyquaternium-7: 2.0 (Enhances the conditioning. You can skip it if you don’t have it).

  • Preservative: (According to your product’s dosage, e.g., 0.6%)

  • Fragrance/Essential Oil: To your taste! :D


Notes from my Beaker:

  • The Emulsifier: Unlike face creams, conditioners need a Cationic charge to stick to the hair (which has a negative charge). Esterquat is the perfect choice because it’s much better for the environment than older conditioning agents.

  • Temperature Check: Use your thermometer! If Phase A isn’t hot enough when it hits the Esterquat, the emulsion won’t be as smooth and stable.

  • The Finish: Once you’ve added your ingredients one by one, give it a final slow stir. You’ll notice the texture becomes very creamy and rich.

Final Verdict: This conditioner is simple but very effective. It leaves the hair soft, easy to comb, and static-free without being too heavy.

HAVE A GREAT DAY!!! 😀

DSCF3512


Lavender and Verbena Soap Recipe (palm free)

Lavender Verbena Soap Recipe

LAB NOTES & SAFETY NOTICE
These are personal experiments for educational use only— not instructions and not for commercial or consumer use. By proceeding, you assume all risks related to safety, testing, and regulatory compliance.
[Full Legal Disclaimer & Safety Requirements]

If you don’t know how to make soap, just follow the link HERE! 😀

For the others of you who already make soap… here is the recipe for 1 Kg of soap:

300 gr Coconut oil
400 gr Olive oil
150 gr Shea butter
50 gr Castor oil
50 gr Cocoa butter
50 gr Almond oil

330 gr water
142 gr lye (6% discount already included)
Temperature of the oils and lye when united: 38°

Once I reached trace I separated the soap paste in two bechers.
In one I added:
– 20 ml Lavender Essential Oil
– Purple CP color

In the other I added:
– 20 ml Verbena Essential Oil (this is one of the few citrusy Essential Oil smells to actually keep persistent in a cold process soap! 😀 I love it!)
– Apple CP color

I also added small balls which I had made with pieces of an old soap 🙂 of course this is not useful and you can decorate your soap as you like! 😀

Hope this was helpful 🙂

The recipe is also Palm free 🙂

DSCF3500

Have a great day! 🙂


Creative Commons License
This work is licensed under a Creative Commons Attribution-NonCommercial-NoDerivatives 4.0 International License.