It’s All in My Hands – Last Update

Hello,

I’m writing to you today to share some news about this blog.

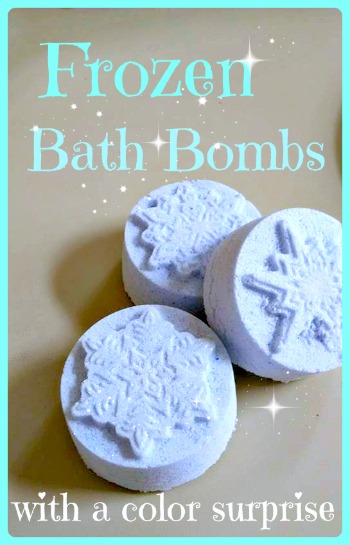
If you’ve been here for a while—some of you since 2012—you know that this space has been my lab. I’ve spent years experimenting with cosmetic formulations and sharing my learning curve. I’ve reached almost 1.5 million views, and I am so grateful for the company you’ve kept me.

I haven’t shared much here lately. To be honest, I’ve felt a bit silenced by all the new rules and regulations. The “proper” way to share experiments started to feel less like a creative process and more like a technical chore.

I’ve never earned a single euro from this blog, and as it gets more expensive and complicated to maintain, I’ve decided it’s time for a change. I am keeping this site online only as a historic archive of my formulation journey, but I won’t be posting here anymore.

However, my hands haven’t stopped working.

I’m returning to where I actually started: crafts, wool, and the simple joy of making things for a cozy home. I’ve started a brand new blog so I can share these new chapters – spinning, knitting, felting, and simple apothecary – without cluttering the formulation archive here.

I would love for you to join me at my new home, if you share any interest in these new subjects:

Wool & Embers STUDIO

Whether you stay to browse the old formulas or follow me to the new studio, thank you for being part of this journey since the beginning.

See you at the new hearth,

Chiara

Ps. Here are some of the things I share now

Smooth Away Face Cream

LAB NOTES & SAFETY NOTICE
For educational purposes only. Content reflects personal, non-professional formulation experiments and is not instructional.
No formula or information on this site is intended for commercial use, consumer application, or third-party use.
Accessing this content means you accept all risks and full responsibility for safety, testing, legal compliance, and outcomes.
[Full Legal Disclaimer & Safety Requirements]

Hello everyone!

IMG_20181029_082916 (1)

Continue reading Smooth Away Face Cream

No Foam Face Wash

LAB NOTES & SAFETY NOTICE
For educational purposes only. Content reflects personal, non-professional formulation experiments and is not instructional.
No formula or information on this site is intended for commercial use, consumer application, or third-party use.
Accessing this content means you accept all risks and full responsibility for safety, testing, legal compliance, and outcomes.
[Full Legal Disclaimer & Safety Requirements]

17693126_10154162682641741_1323540383_o

Lab Note: My “No-Foam” Gentle Face Wash

Hello Hello! :D This recipe is very special to me. For two years, I struggled with a constant, annoying form of acne. I was doing everything “right” according to the commercials—scrubbing like crazy, using alcoholic toners, and applying aggressive creams. Nothing worked!

Then, I finally decided to give my skin a break. I stopped the aggression and started treating my skin with respect. This face wash was a huge part of that. It doesn’t make a big foam, and it doesn’t leave your skin feeling “squeaky” (which usually just means “stripped!“), but it cleans perfectly.

The “Why” behind the formula:

I wanted a very delicate ASM of only 6.5%. Most shampoos are 15%, so you can see how much gentler this is! I also used a “Trio” of surfactants to keep it balanced:

  • Sodium Lauroyl Sarcosinate: My primary surfactant. It’s so much softer than SLES!

  • Cocamidopropyl Betaine: Added specifically to make the first one even milder.

  • Lauryl Glucoside: A non-ionic touch to keep everything stable.

The Formula:

Phase A:

  • Water to 100

  • Glycerin 3

  • Xanthan Gum 0.5 (I add this because Sarcosinate loves to become as liquid as water! This gives it a little “body” so it doesn’t slip through your fingers.)

  • Preservative (Water-soluble!)

Phase B:

  • Sodium Lauroyl Sarcosinate – 10

  • Lauryl Glucoside – 2 (It’s a dense paste, so microwave it for a few seconds first! :D)

  • Lavender EO – 2 drops

  • Sage EO – 2 drops (I love these for acne-prone skin because they are so soothing.)

Phase C:

  • Cocamidopropyl Betaine – 6

  • Lactic Acid (To reach pH 5—this is the secret to making it dense!)


Notes from the Beaker:

  1. Mixing with Love: I mixed everything very slowly with a spoon. If you mix too fast, you get a beaker full of bubbles and you’ll have to wait ages for them to go away!

  2. The pH Secret: This is the most important part! You must lower the pH to 5 using Lactic or Citric acid. One drop at a time! When you hit pH 5, the Sarcosinate suddenly becomes dense and “creamy.” If you go lower than 5, it might go liquid again, so be careful! 😉

  3. The Order: I add the Betaine (Phase C) at the very end. Sometimes adding it too early makes the whole thing “melt” into a liquid mess.

  4. A Touch of Color: I added one tiny drop of blue food coloring just to make it look pretty and fun in my bathroom.

Final Verdict: This face wash doesn’t “shout,” but it works. It leaves my skin calm, hydrated, and happy. If you are tired of aggressive products, give this a try! ENJOY! 🙂

17761561_10154162625556741_1284166204_o


DIY Cucumber Wasabi Deodorant

LAB NOTES & SAFETY NOTICE
For educational purposes only. Content reflects personal, non-professional formulation experiments and is not instructional.
No formula or information on this site is intended for commercial use, consumer application, or third-party use.
Accessing this content means you accept all risks and full responsibility for safety, testing, legal compliance, and outcomes.
[Full Legal Disclaimer & Safety Requirements]

Cucumber Wasabi Deodorant 2

Hello Hello! 😀 Today I am experimenting making something a bit… unusual. Yes, I am putting Wasabi in a deodorant!

The Secret Science:

I used Wasabi Extract (Wasabia Japonica) because it should be naturally antimicrobial, but I also added Triethyl Citrate. Here’s the trick: Bacteria under your arms try to eat your sweat and turn it into stinky fatty acids. But Triethyl Citrate “tricks” them—the bacteria eat it instead, and it lowers the pH so the “stink-makers” can’t grow. It’s so smart! yeheee!

The Formula:

Phase A:

  • Water to 100
  • Glycerin 2
  • Xanthan Gum 0.5 (To make it a nice “roll-on” gel texture)

Phase B:

  • Alcohol Denat. (96°) – 15 (This helps it dry fast and kills bacteria on contact. It can be lowered to 10%.)
  • Triethyl Citrate – 5 (the “stink-stopper” hero!)
  • Wasabi Extract – 2 (The antimicrobial star!)
  • Polysorbate 20 – 2 (This is the solubilizer—it helps the “oily” parts mix into the water phase.)

Phase C:

  • Zinc Ricinoleate – 2 (This literally “traps” odor molecules like a cage!)
  • Preservative (According to your type)
  • Essential Oils – 10 drops (I used Lemon and Eucalyptus for that super fresh, clean feeling!)

Notes from the Beaker:

  1. The Mix: I mixed the Xanthan Gum into the water first until I had a smooth, clear gel.
  2. The Alcohol Trick: I mixed the essential oils and the Triethyl Citrate into the Alcohol/Polysorbate first. This ensures you don’t get oily droplets floating on top of your water!
  3. The Smell: The Wasabi extract I use is very mild, and once I added the Lemon and Eucalyptus, it just smelled incredibly fresh!
  4. pH Check: I wanted it to be around pH 4.5 to 5. Most armpit bacteria hate acidity, so keeping it low helps the deodorant work even better!

Final Verdict: This is a life-saver for summer. It’s fresh, it’s liquid, and it doesn’t leave white marks on your favorite black t-shirt. It’s my “secret weapon” against the heat! ENJOY! 😀

“Frozen” Bath Bombs with color surprise

LAB NOTES & SAFETY NOTICE
For educational purposes only. Content reflects personal, non-professional formulation experiments and is not instructional.
No formula or information on this site is intended for commercial use, consumer application, or third-party use.
Accessing this content means you accept all risks and full responsibility for safety, testing, legal compliance, and outcomes.
[Full Legal Disclaimer & Safety Requirements]

Frozen Bath Bombs DIY


Lab Note: My “Frozen” Icy Bath Bombs

Hello Hello! 😀 Today I’m diving into something a little magical. I wanted to create a bath bomb that felt like a winter wonderland—something icy, sparkly, and super relaxing. I call them my Frozen Bath Bombs!

Usually, people think of bath bombs as “fizzy toys,” but I wanted mine to actually do something for the skin while looking like little pieces of a glacier. yeheee! 😀

The “Ice” Strategy:

To get that “Frozen” look, I used a mix of Ultramarine Blue and a ton of Silver Bio-Mica. For the scent, I went with something crisp and “cold”—a mix of Peppermint and Eucalyptus. When they hit the hot water, the contrast between the steam and the minty scent is just incredible!

The Formula:

Phase A (The Dry Base):

  • Sodium Bicarbonate – 100g (The fizz!)

  • Citric Acid – 50g (I always use a 2:1 ratio of bicarb to acid—it’s the golden rule for a perfect reaction!)

  • Corn Starch (or Cream of Tartar) – 20g (This makes the bombs harder and the water feel silky.)

  • Silver Mica & Blue Pigment (As much as I needed to get that “Elsa” blue! :D)

Phase B (The “Glue”):

  • Cocoa Butter – 10g (I melted this down. It acts as the binder but also makes the bath water super moisturizing.)

  • Polysorbate 80 – 5g (This is CRUCIAL! If you don’t use this, the blue mica and cocoa butter will create a greasy blue ring around your tub. Nobody wants to scrub the tub after a relaxing bath! :P)

  • Essential Oil Blend – 20-30 drops (Peppermint and Eucalyptus for that icy “Frozen” breath.)


Notes from the Beaker:

  1. The “Snow” Texture: I mixed the dry ingredients first, making sure there were no clumps of blue pigment. Then I added the liquid oils drop by drop. You want it to feel like “wet sand”—if you squeeze it in your hand, it should hold its shape!

  2. The Polysorbate Trick: I cannot stress this enough—Polysorbate 80 is the secret to a “clean” bath bomb. It helps the oils and colors disperse into the water instead of floating on top.

  3. The Molding: I packed them into the molds really tight. If you are too gentle, they will just crumble when they dry.

  4. Drying Time: I left mine to dry for a full 24 hours in a room with low humidity. If it’s raining outside, they might start to “fizz” on the counter before you even use them!

Final Verdict: These are just beautiful. The water turns a shimmering, magical blue, and the peppermint makes my skin feel all tingly and fresh. It’s like taking a bath in a fairy tale. ENJOY! 😀

Frozen (5)


“Hydrating Elixir” Serum with Hyaluronic Acid

LAB NOTES & SAFETY NOTICE
For educational purposes only. Content reflects personal, non-professional formulation experiments and is not instructional.
No formula or information on this site is intended for commercial use, consumer application, or third-party use.
Accessing this content means you accept all risks and full responsibility for safety, testing, legal compliance, and outcomes.
[Full Legal Disclaimer & Safety Requirements]

Hyaluronic Acid and Sodium Lactate Serum 6

Hello Hello! 😀 Today I share one of my last experiments in the home “lsab”. Where I live, we had days over 40°C, and I just wanted something that felt icy and refreshing. I decided to formulate a serum that behaves perfectly when stored in the fridge—though I always remind myself: even if it’s cold, THERE IS NO ESCAPE FROM PRESERVATIVES! 😀

This is an “upgraded” version of my basic Hyaluronic Acid gel. I wanted to include two salts that I usually can’t put in my lotions because my favorite polymeric emulsifiers are such picky divas when it comes to salts! But in a simple water-based serum, they are absolute stars.

The Formula I Used:

  • Water: to 100%

  • Sodium Hyaluronate (high molecular weight): 1%

  • Sodium Hyaluronate (low molecular weight): 0.5%

  • Sodium Lactate: 2%

  • Sodium PCA: 1%

  • Niacinamide (Vitamin B3): 2.5%

  • D-Panthenol: 0.5%

  • Phenonip: 0.5%

  • Fragrance oil (Rock Candy): 0.2%


Notes from my Beaker:

  1. The Hyaluronic “Fuss”: I measured out the water and poured the high molecular weight HA on top. Usually, I try to be patient and let it hydrate naturally, but I was in a rush! I used a stick blender which made it cloudy at first, but after a few days, it turned perfectly transparent. I did the same with the low molecular weight version right after.

  2. The Humectant Boost: I added the Sodium Lactate and Sodium PCA next. Since these are naturally found in our skin (NMF), they make the serum feel so high-performing.

  3. The Niacinamide Caution: I love using Vitamin B3 in the summer, but it’s so sensitive to pH. I measured mine and it was around 7.5, so I used a couple of drops of lactic acid to bring it down to pH 6.5. It’s essential to keep it in that neutral range!

  4. A Touch of Pink: I added one drop of pink food colorant just to pamper myself. It wasn’t a necessity, but it looks so pretty in the bottle!

  5. The Scent: I used a “Rock Candy” fragrance (the Rock Star dupe) and I absolutely LOVE it.

Final Verdict: I was a bit worried that with so many hygroscopic ingredients, it would feel sticky in the 40°C heat, but it’s not at all! I think the Niacinamide really helps with that. I only apply one drop and my skin feels unbelievably smooth. It’s the perfect “fridge treat” for the face. ENJOY! 🙂

Hyaluronic Acid and Sodium Lactate Serum 3

I have added one drop of pink food colorant cause I like to pamper myself with colors. Was it a necessity? Nope.
The Fragrance Oil used in this Serum was Rock Candy from Sensory Perfection (the L**h dupe for “Rock Star”) and I LOVE IT! 🙂

Hyaluronic Acid and Sodium Lactate Serum 4

Hyaluronic Acid and Sodium Lactate Serum


Spring Hydrating and Multivit – Face Cream

LAB NOTES & SAFETY NOTICE
For educational purposes only. Content reflects personal, non-professional formulation experiments and is not instructional.
No formula or information on this site is intended for commercial use, consumer application, or third-party use.
Accessing this content means you accept all risks and full responsibility for safety, testing, legal compliance, and outcomes.
[Full Legal Disclaimer & Safety Requirements]

Spring Face Cream - Itsallinmyhands

My “Multivit” Spring Hydrating Cream

Hello Hello! 😀 Today I’m so happy to share my recipe for a “skin-awakening” cream. I made this specifically for the transition into Spring. During winter, my skin always ends up looking a bit dull and “tired,” so I wanted something light, super hydrating, and packed with vitamins to bring back that healthy glow! yeheee!

The Vitamin Cocktail:

I didn’t want a heavy, occlusive cream; I wanted a “water-bomb” effect. I used a combination of Pro-Vitamin B5 (Panthenol) for healing, Vitamin E for protection, and a touch of Vitamin C (the stable version!) to brighten things up. It’s like a fresh smoothie for the face!

The Formula:

Phase A:

  • Water to 100

  • Glycerin 3

  • Xanthan Gum 0.2

  • Hyaluronic Acid (1% solution) – 5 (This is the secret for that “plump” Spring skin!)

Phase B:

  • Emulsifier (I used Olivem 1000) – 4 (I lowered it slightly from 5 to 4 to keep it lighter for the warmer weather.)

  • Rice Bran Oil – 3 (Very light and full of antioxidants.)

  • Jojoba Oil – 2

  • Ethylhexyl Stearate – 3 (This is a very fast-spreading “dry” oil that helps the cream absorb in seconds!)

Phase C (The Vitamin Boost):

  • Panthenol (B5) – 1

  • Tocopherol (Vitamin E) – 1

  • Sodium Ascorbyl Phosphate (Vitamin C) – 0.5 (This stable version of Vitamin C is great because it doesn’t irritate the skin as much!)

  • Niacinamide (Vitamin B3) – 2 (My absolute favorite for refining pores and evening out the skin tone.)

  • Preservative (According to your type)

  • Fragrance (I used a “Green Tea and Lemon” scent—it smells so fresh! :D)


Notes from the Beaker:

  1. The Niacinamide Trick: I make sure to dissolve the Niacinamide in a tiny bit of water from Phase A before adding it at the end. If the pH of your cream is too low (below 5), Niacinamide can get “angry” and turn into nicotinic acid, which makes your face flush red! So I always check that the pH is exactly 5.5.

  2. Lightness is Key: Since this is for Spring, I used more “dry” emollients. If you feel like it’s still too heavy, you can swap the Jojoba for more Rice Bran oil.

  3. The Glow: The combination of Vitamin C and Hyaluronic acid gives an immediate brightness. It doesn’t hide imperfections; it just makes the skin look “awake.”

  4. Heating: Usual drill! Heat A and B to 70°C, then combine. Wait until it’s below 40°C before adding all those precious vitamins in Phase C, or the heat might destroy them!

Final Verdict: I’ve been using this for a week and my skin feels so much more resilient. It’s the perfect “reset” button after a long, cold winter. ENJOY! 😀