DIY Cucumber Wasabi Deodorant

LAB NOTES & SAFETY NOTICE
For educational purposes only. Content reflects personal, non-professional formulation experiments and is not instructional.
No formula or information on this site is intended for commercial use, consumer application, or third-party use.
Accessing this content means you accept all risks and full responsibility for safety, testing, legal compliance, and outcomes.
[Full Legal Disclaimer & Safety Requirements]

Cucumber Wasabi Deodorant 2

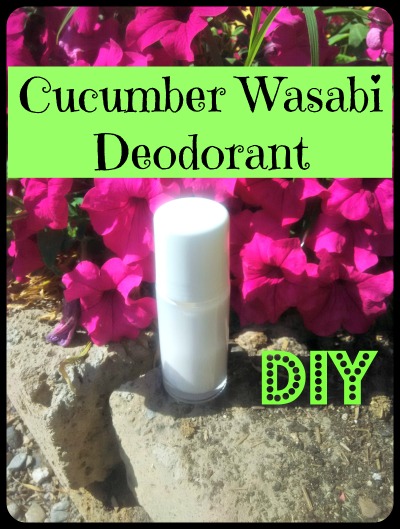
Hello Hello! 😀 Today I am experimenting making something a bit… unusual. Yes, I am putting Wasabi in a deodorant!

The Secret Science:

I used Wasabi Extract (Wasabia Japonica) because it should be naturally antimicrobial, but I also added Triethyl Citrate. Here’s the trick: Bacteria under your arms try to eat your sweat and turn it into stinky fatty acids. But Triethyl Citrate “tricks” them—the bacteria eat it instead, and it lowers the pH so the “stink-makers” can’t grow. It’s so smart! yeheee!

The Formula:

Phase A:

  • Water to 100
  • Glycerin 2
  • Xanthan Gum 0.5 (To make it a nice “roll-on” gel texture)

Phase B:

  • Alcohol Denat. (96°) – 15 (This helps it dry fast and kills bacteria on contact. It can be lowered to 10%.)
  • Triethyl Citrate – 5 (the “stink-stopper” hero!)
  • Wasabi Extract – 2 (The antimicrobial star!)
  • Polysorbate 20 – 2 (This is the solubilizer—it helps the “oily” parts mix into the water phase.)

Phase C:

  • Zinc Ricinoleate – 2 (This literally “traps” odor molecules like a cage!)
  • Preservative (According to your type)
  • Essential Oils – 10 drops (I used Lemon and Eucalyptus for that super fresh, clean feeling!)

Notes from the Beaker:

  1. The Mix: I mixed the Xanthan Gum into the water first until I had a smooth, clear gel.
  2. The Alcohol Trick: I mixed the essential oils and the Triethyl Citrate into the Alcohol/Polysorbate first. This ensures you don’t get oily droplets floating on top of your water!
  3. The Smell: The Wasabi extract I use is very mild, and once I added the Lemon and Eucalyptus, it just smelled incredibly fresh!
  4. pH Check: I wanted it to be around pH 4.5 to 5. Most armpit bacteria hate acidity, so keeping it low helps the deodorant work even better!

Final Verdict: This is a life-saver for summer. It’s fresh, it’s liquid, and it doesn’t leave white marks on your favorite black t-shirt. It’s my “secret weapon” against the heat! ENJOY! 😀

“Hydrating Elixir” Serum with Hyaluronic Acid

LAB NOTES & SAFETY NOTICE
For educational purposes only. Content reflects personal, non-professional formulation experiments and is not instructional.
No formula or information on this site is intended for commercial use, consumer application, or third-party use.
Accessing this content means you accept all risks and full responsibility for safety, testing, legal compliance, and outcomes.
[Full Legal Disclaimer & Safety Requirements]

Hyaluronic Acid and Sodium Lactate Serum 6

Hello Hello! 😀 Today I share one of my last experiments in the home “lsab”. Where I live, we had days over 40°C, and I just wanted something that felt icy and refreshing. I decided to formulate a serum that behaves perfectly when stored in the fridge—though I always remind myself: even if it’s cold, THERE IS NO ESCAPE FROM PRESERVATIVES! 😀

This is an “upgraded” version of my basic Hyaluronic Acid gel. I wanted to include two salts that I usually can’t put in my lotions because my favorite polymeric emulsifiers are such picky divas when it comes to salts! But in a simple water-based serum, they are absolute stars.

The Formula I Used:

  • Water: to 100%

  • Sodium Hyaluronate (high molecular weight): 1%

  • Sodium Hyaluronate (low molecular weight): 0.5%

  • Sodium Lactate: 2%

  • Sodium PCA: 1%

  • Niacinamide (Vitamin B3): 2.5%

  • D-Panthenol: 0.5%

  • Phenonip: 0.5%

  • Fragrance oil (Rock Candy): 0.2%


Notes from my Beaker:

  1. The Hyaluronic “Fuss”: I measured out the water and poured the high molecular weight HA on top. Usually, I try to be patient and let it hydrate naturally, but I was in a rush! I used a stick blender which made it cloudy at first, but after a few days, it turned perfectly transparent. I did the same with the low molecular weight version right after.

  2. The Humectant Boost: I added the Sodium Lactate and Sodium PCA next. Since these are naturally found in our skin (NMF), they make the serum feel so high-performing.

  3. The Niacinamide Caution: I love using Vitamin B3 in the summer, but it’s so sensitive to pH. I measured mine and it was around 7.5, so I used a couple of drops of lactic acid to bring it down to pH 6.5. It’s essential to keep it in that neutral range!

  4. A Touch of Pink: I added one drop of pink food colorant just to pamper myself. It wasn’t a necessity, but it looks so pretty in the bottle!

  5. The Scent: I used a “Rock Candy” fragrance (the Rock Star dupe) and I absolutely LOVE it.

Final Verdict: I was a bit worried that with so many hygroscopic ingredients, it would feel sticky in the 40°C heat, but it’s not at all! I think the Niacinamide really helps with that. I only apply one drop and my skin feels unbelievably smooth. It’s the perfect “fridge treat” for the face. ENJOY! 🙂

Hyaluronic Acid and Sodium Lactate Serum 3

I have added one drop of pink food colorant cause I like to pamper myself with colors. Was it a necessity? Nope.
The Fragrance Oil used in this Serum was Rock Candy from Sensory Perfection (the L**h dupe for “Rock Star”) and I LOVE IT! 🙂

Hyaluronic Acid and Sodium Lactate Serum 4

Hyaluronic Acid and Sodium Lactate Serum


Q10 Antioxidant Face Cream DIY

LAB NOTES & SAFETY NOTICE
For educational purposes only. Content reflects personal, non-professional formulation experiments and is not instructional.
No formula or information on this site is intended for commercial use, consumer application, or third-party use.
Accessing this content means you accept all risks and full responsibility for safety, testing, legal compliance, and outcomes.
[Full Legal Disclaimer & Safety Requirements]

Q10 Antioxidant Face Cream DIY

Lab Note: My “Antioxidant Network” Experiment!

Hello Hello! 😀 Today I am so excited to share an experiment that is a bit “brainy” but so cool! I call it the Antioxidant Network. Usually, we just pick one “hero” ingredient like Vitamin C, but I wanted to try something different. I wanted to build a team!

The idea is the Redox Theory—it’s like a relay race for your skin. When one antioxidant gets “tired” from fighting free radicals, the others step in to “recharge” it so the whole system keeps working. It’s synergy in a jar! yeheee! 😀

The Team Members:

  • Coenzyme Q10: The energy booster! It gives the cream a lovely yellow tint.

  • SAP (Vitamin C): I used Sodium Ascorbyl Phosphate because it’s way less “grumpy” and irritating than pure Vitamin C.

  • Alpha-Lipoic Acid (0.5%): The “Universal” antioxidant. Warning: This stuff has a “Hell-Smell” of its own—it’s very sulfuric! I only used 0.5% because I wanted the benefits without smelling like a matchstick factory. 😛

  • Vitamin E: To protect the oils and the skin’s lipids.

The Emulsifier “Fuss”: Hitecream 3000

I played with Hitecream 3000 for this one. It’s a vegetable, protein-based emulsifier that’s supposed to be super skin-compatible. I used it at 7% on its own. It gave a stable cream, but next time I might drop it to 5% and add a bit of Cetyl Alcohol to make the texture feel a bit more “posh.”

The Formula I Used:

Phase A:

  • Distilled Water: to 100

  • Glycerin: 2.0

  • Carbopol Ultrez 21 / Xanthan: 0.3 / 0.2 (My hybrid gelling system!)

Phase B:

  • Hitecream 3000: 7.0

  • Kokum & Murumuru Butters: 1.5 / 1.0 (Love my dry butters!)

  • Dicaprylyl Ether: 1.5

  • Tocopherol (Vitamin E): 1.0

Phase C (The Antioxidant Cold Phase):

  • Safflower & Ribes Nigrum Oils: 0.5 / 0.5

  • Q10 / Alpha-Lipoic Acid: 0.1 / 0.5

Phase D (The Finishing Touch):

  • SAP (Vitamin C): 1.0

  • Rose Water: 10.0 (To dissolve the SAP)

  • D-Panthenol / Preservative: 1.0 / q.s.


Notes from my Beaker:

  1. The “No-Stir” Trick: For the Carbopol Ultrez 21, I just let it float on the water until it hydrated itself. No clumps, no stress! Then I added my Xanthan-Glycerin slurry.

  2. Heat it Up: Hitecream needs to hit 70°C to wake up and start working.

  3. The Cooling Phase: I was very careful here. I pre-dispersed the Q10 and that stinky Alpha-Lipoic acid in the cold oils (Phase C) and only added them when the cream was cool. I also dissolved the SAP in Rose Water before stirring it in.

  4. The Look: The Q10 makes it a pale yellow, but I added one drop of food colorant just to make it look “fresh” and pretty on my vanity.

Final Verdict: The synergy between the SAP and the Q10 really made my skin look vibrant! Even with the slight “sulfur” hint from the Alpha-Lipoic acid, I really liked how this cream performed. It feels like a high-tech shield for the face! ENJOY! 🙂

Water in Cosmetic DIYs

LAB NOTES & SAFETY NOTICE
For educational purposes only. Content reflects personal, non-professional formulation experiments and is not instructional.
No formula or information on this site is intended for commercial use, consumer application, or third-party use.
Accessing this content means you accept all risks and full responsibility for safety, testing, legal compliance, and outcomes.
[Full Legal Disclaimer & Safety Requirements]

Water

Aqueous Phase Standards & The “Water to 100” Logic

In my formulation studies, water is the most voluminous and technically volatile component. Because water supports microbial life, its purity and the logic behind its calculation are the primary safeguards for a stable product.

1. The Purity Hierarchy: Beyond the Tap

The choice of water is not negotiable. Standard tap water contains minerals (electrolytes) and metal ions that can destabilize emulsions and deactivate preservatives.

  • Demineralized Water: Free of minerals that interfere with electrolyte-sensitive ingredients (like Carbomers or specific emulsifiers).

  • Microbiologically Pure Water: Required to ensure we aren’t introducing bacteria or fungal spores into the batch.

  • The “Boil and Hold” Protocol: If commercially distilled, sterile water is unavailable, I utilize a high-heat mitigation strategy. I boil demineralized water for at least 20 minutes to reduce the bio-burden. This does not guarantee 100% sterility, but it significantly increases the efficacy of the final preserving system.

2. The “Heat and Hold” Method

When executing heated emulsions, I often utilize the Heat and Hold technique. This involves maintaining both Phase A (Aqueous) and Phase B (Lipid) at 70°C–75°C for 20 minutes.

  • Objective: To ensure all high-melting-point waxes are fully integrated and to provide a secondary thermal “kill step” for potential pathogens in the water phase.


3. The Mathematical Protocol: “Water to 100”

In professional formulation, we work exclusively in Percentages (%). This ensures that the concentration of active ingredients and preservatives remains constant, regardless of the batch size or substitutions.

Why we calculate water last:

By listing water as “Water to 100,” we treat it as a flexible solvent. If I decide to increase an active ingredient from 1% to 2%, I do not reduce my preservative; I simply reduce the water. This maintains the integrity of the chemical ratios.

Example Calculation: If a formula requires:

  • Gelling Agent: 1.5%

  • Preservative: 0.5%

  • Actives: 3.0%

The math follows:

If I substitute a gelling agent that requires 3.5% for the same viscosity, the math updates automatically:

Result: The preservative remains at exactly 0.5% of the total mass, ensuring the product remains safe.


Researcher Summary

“Water to 100” is the language of the cosmetic chemist. It allows for agility in the lab—permitting substitutions and adjustments without compromising the safety or performance of the final cosmetic. Remember: Where there is water, there must be a preservative.

Silicones in cosmetics – the truth

LAB NOTES & SAFETY NOTICE
For educational purposes only. Content reflects personal, non-professional formulation experiments and is not instructional.
No formula or information on this site is intended for commercial use, consumer application, or third-party use.
Accessing this content means you accept all risks and full responsibility for safety, testing, legal compliance, and outcomes.
[Full Legal Disclaimer & Safety Requirements]

Silicones

Silicone Chemistry — Performance, Breathability, and Sustainability

In the modern cosmetic landscape, silicones (organosilicon compounds) are often misunderstood. My research objective was to evaluate these molecules based on their technical performance, their interaction with skin physiology, and their environmental impact.

1. Performance Theory: The “Velvet” Effect

Silicones are utilized in high-end formulations not because they are “cheap fillers,” but because they offer a unique sensory profile that natural oils cannot replicate.

  • Surface Tension: Silicones have very low surface tension, allowing them to spread easily and create a “dry-touch” silkiness.

  • Stability: Unlike natural vegetable oils, silicones are highly resistant to oxidation and heat, making them excellent carriers for chemical UV filters and pigments.

  • The “Illusion” of Health: While silicones provide an immediate smoothing effect, it is critical to distinguish between aesthetic improvement and biological hydration. Silicones do not “nourish” the skin; they provide a temporary protective and perfecting film.

2. The Breathability Myth: Pore Clogging (Comedogenicity)

The claim that silicones “suffocate” the skin is largely unsupported by molecular science.

  • Molecular Size: Most silicones are large, stable molecules that sit on top of the Stratum Corneum. Because of their unique “staggered” molecular structure, they are generally permeable to oxygen and water vapor.

  • Viscosity Variations: * Volatile Silicones (e.g., Cyclopentasiloxane): Evaporate quickly, leaving a weightless finish.

    • Non-Volatile Silicones (e.g., Dimethicone): Heavier and more occlusive. While technically non-comedogenic, their “film-forming” nature can trap sweat or sebum underneath in certain skin types, which may lead to breakouts for individuals like myself.


3. The Sustainability Concern: Environmental Persistence

While silicones are safe for human topical application, their environmental “footprint” is significant.

  • Origin: Derived from Silica (Sand), not petroleum.

  • Biodegradability: The very stability that makes silicones excellent for formulation makes them problematic for the planet. They are largely non-biodegradable. Once washed down the drain, these molecules persist in the ecosystem for decades.

  • Researcher Stance: As formulators in 2026, we must weigh the aesthetic benefits of silicones against their long-term environmental persistence.


4. Hair Care: The “Build-Up” Phenomenon

In hair care, silicones function as high-performance conditioning agents.

  • The Benefit: They coat the hair shaft, smoothing the cuticle and reducing friction (easier combing).

  • The Downside: Over-use of heavy silicones can lead to “Build-Up,” where the layer becomes too thick, making the hair appear lank and heavy. In my formulas, I limit silicone inclusion to 1% to achieve “slip” without the weight.


Researcher Summary

Silicones are neither “miraculous” nor “dangerous.” They are sophisticated tools for texture manipulation. In medical settings, their stability and low allergenicity make them ideal for scar treatment and wound care. In cosmetics, they are the key to the “velvet” finish.

My Lab Philosophy: Use silicones intentionally for performance (e.g., in foundations or high-slip conditioners), but do not rely on them as a substitute for genuine skin-nourishing actives like Niacinamide, Panthenol, or Linoleic-rich oils.

Caffeine & Escin Eye Cream DIY

LAB NOTES & SAFETY NOTICE
For educational purposes only. Content reflects personal, non-professional formulation experiments and is not instructional.
No formula or information on this site is intended for commercial use, consumer application, or third-party use.
Accessing this content means you accept all risks and full responsibility for safety, testing, legal compliance, and outcomes.
[Full Legal Disclaimer & Safety Requirements]

Escin and Caffeine Eye Cream

Lab Note: My “Dusty” Escin Eye Cream Experiment

Hello Hello! 😀 Today I’m looking back at a formula that required a very steady hand and a bit of patience. I wanted to create a treatment specifically for the delicate eye area, focusing on puffiness and those tired mornings. yeheee!

The star of this experiment was Escin (the active from Horse Chestnut). If you’ve worked with it, you know it’s a very fine, “dusty” powder that can be a bit of a diva to incorporate. But it’s so worth it for its ability to support microcirculation! I also included Caffeine to give the skin a little “wake-up call.”

The Formula I Used:

Phase A:

  • Distilled Water: to 100

  • Glycerin: 2.0

  • Caffeine: 0.5 (I dissolved this in the hot water phase)

  • Xanthan Gum: 0.2

Phase B (The Light Lipid Phase):

  • Methyl Glucose Sesquistearate: 3.0 (My reliable emulsifier)

  • Cetyl Alcohol: 1.0 (Just a little for stability)

  • Argan Oil: 3.0 (Rich in Vitamin E but not too heavy)

  • Rice Bran Oil: 2.0

  • Shea Butter: 0.5 (Just a tiny touch for creaminess)

Phase C (The Active Cold Phase):

  • Escin: 1.0 (The “dusty” hero!)

  • Cornflower Water (Hydrolat): 10.0 (Soothing for the eyes)

  • D-Panthenol: 1.0

  • Tocopherol (Vitamin E): 0.5

  • Preservative: (According to my usual lab choice)


Notes from my Beaker:

  1. The Caffeine Trick: I made sure to add the Caffeine to Phase A while the water was hot. It dissolves much better that way, so you don’t end up with any “crunchy” bits in your eye cream!

  2. Handling the Escin: This was the trickiest part. Escin is very light and dusty. I found that pre-mixing it with the Cornflower Water in Phase C to create a smooth slurry made it much easier to fold into the emulsion without it flying everywhere!

  3. The Texture: Because it’s for the eyes, I wanted it to be light. The combination of Argan and Rice Bran oil makes it sink in quickly so it doesn’t mess up my concealer later.

  4. pH is Critical: For the eye area, I was extremely careful to check the pH. I kept it right at 6.0 to 6.5. Our eyes are much more sensitive to acidity than the rest of our face, so “neutral” is the way to go here.

Final Verdict: I’ve been using this in the mornings, and I really notice a difference in how “awake” my eyes look. The Escin and Caffeine duo is like a double espresso for the face! It’s a bit of a “picky” formula to make, but the results are so elegant. ENJOY! 😀

Escin and Caffeine Eye Cream14

DIY Karma Shampoo (extra delicate!) & chat on betaine

LAB NOTES & SAFETY NOTICE
These are personal experiments for educational use only—not for commercial or consumer use. By proceeding, you assume all risks related to safety, testing, and regulatory compliance.
[Full Legal Disclaimer & Safety Requirements]

Hello everyone! 😀

Make your own Karma Shampoo

Hello Hello! 😀 Today I’m sharing my experiment with a formula that is all about finding the perfect “Karma” for my hair. I know I’ve been experimenting with a lot of sulfate-free stuff lately, but sometimes you just want that really deep, satisfying clean that only SLES can give—especially if you’ve been using a lot of hairspray or if your hair just feels “heavy.”

The challenge I set for myself was: Can I use SLES but make it feel like a high-end, expensive boutique shampoo instead of something harsh?

The secret is all in the TMG (Trimethylglycine). (Trimethylglycine). I didn’t just want bubbles; I wanted protection. TMG is an anhydrous betaine that is a total powerhouse for hydration. Adding it to a SLES base is a game-changer because it helps protect the scalp and hair from the drying effects of the surfactants. It’s like giving your hair a big drink of water while you clean it!

The Formula

Phase A:

  • Water: to 100

  • Glycerin: 3

  • Guar Hydroxypropyltrimonium Chloride: 0.2

Phase B:

  • Sodium Laureth Sulfate (SLES): 25

  • Cocamidopropyl Betaine: 10

  • Coco-Glucoside: 5

  • TMG (Trimethylglycine): 3

Phase C:

  • Hydrolyzed Wheat Protein: 1

  • Panthenol: 0.5

  • Preservative: (According to my usual lab choice)

  • Fragrance Oil: (Karma type scent)

  • Citric Acid: (To reach pH 5.5)

  • Salt (Sodium Chloride): (A pinch to thicken)

My notes from the experiment:

The best part was watching the texture change. When I started adding the Citric Acid to bring the pH down to 5.5, and then just a tiny pinch of salt at the very end, the shampoo turned into this gorgeous, thick “honey” consistency. It’s so satisfying to pour!

The result is exactly what I wanted. You get those huge, fluffy bubbles that everyone loves, but when you rinse it off, your hair doesn’t feel like “straw.” It feels clean, bouncy, and smells like a L**h dupe 😀 . It just goes to show that with the right balance, even the “strong” ingredients can have great Karma! ENJOY! 😀