No SLES Shampoo DIY

LAB NOTES & SAFETY NOTICE
For educational purposes only. Content reflects personal, non-professional formulation experiments and is not instructional.
No formula or information on this site is intended for commercial use, consumer application, or third-party use.
Accessing this content means you accept all risks and full responsibility for safety, testing, legal compliance, and outcomes.
[Full Legal Disclaimer & Safety Requirements]

No Sles Shampoo

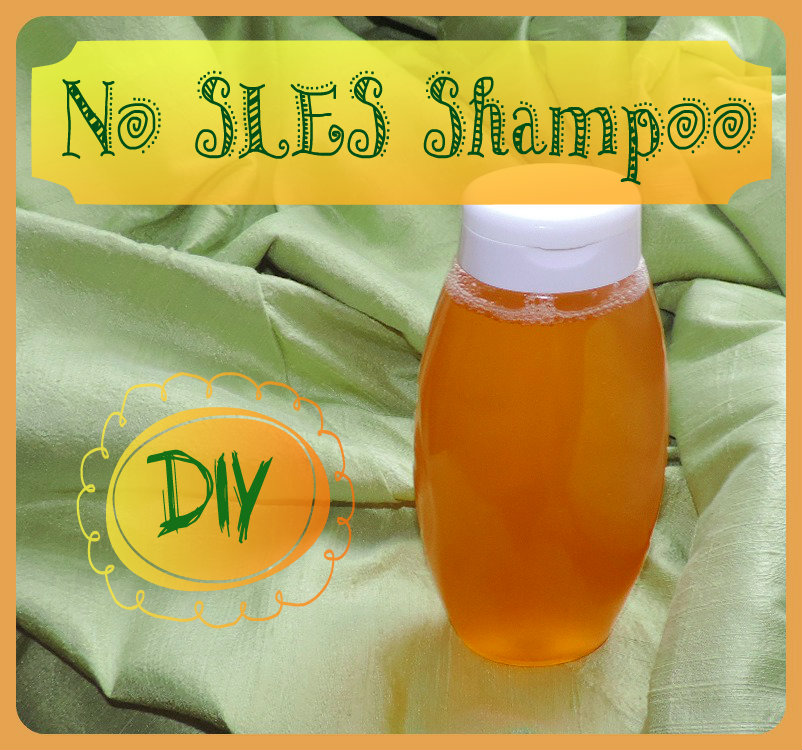
My “No-SLES” Gentle Shampoo Experiment

Hello Hello! :D 

I wanted something that felt sophisticated and gentle—a recipe that treats the scalp like skin rather than just “hair ground.” yeheee! :D
While I do not hate SLES at all and I find that they can be useful in many ways, at the same time I am trying something different because sometimes my scalp gets itchy by the aggressivness that a commercial SLES shampoo can carry. SLES shampoos are sometimes formulated poorly (maybe for keeping the costs low) and can therefore be too aggressive. 

Here I have decided to experiment with a NON-SLES shampoo, simply to see what’s out there and what can be done differently.

The “Gentle” Strategy:

Instead of the usual SLES, I decided to play with a combination of Sodium Lauroyl Sarcosinate and Glucosides. Sarcosinate is such a dream—it’s derived from an amino acid and it gives a beautiful, creamy foam without being a “bully” to the hair cuticle.

The Formula for my Experiment:

Phase A:

  • Water to 100

  • Glycerin 3

  • Polyquaternium-10 – 0.3 (I included this because it helps with the “combability”—no one likes bird-nest hair! :P)

Phase B (The Cleansing Blend):

  • Sodium Lauroyl Sarcosinate – 12

  • Cocamidopropyl Betaine – 8

  • Coco-Glucoside – 4

  • Lauryl Glucoside – 2 (This one is thick, so I had to be patient while mixing!)

Phase C:

  • Hydrolyzed Silk Proteins – 1 (For that “silk” touch I love!)

  • Panthenol – 0.5

  • Preservative (According to my lab’s setup)

  • Fragrance (I used a fresh, “Rain” scent—it feels so pure!)

  • Lactic Acid (To reach the “Golden pH” of 5.5)


Notes from my Beaker:

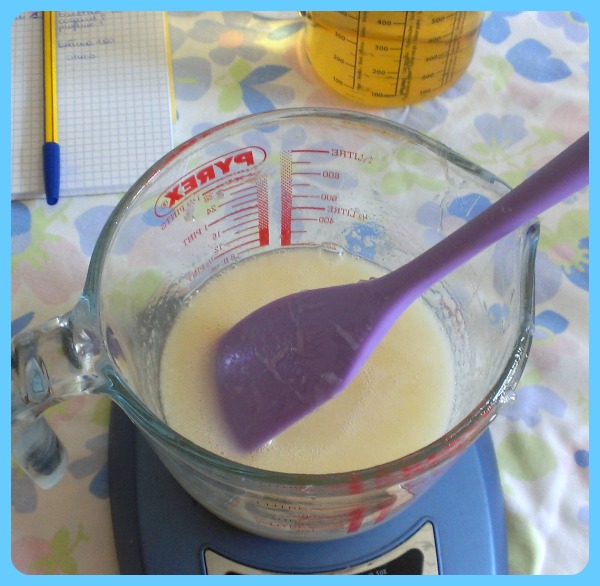
  1. The Foam Surprise: I was actually worried that a No-SLES shampoo wouldn’t foam enough, but I was wrong! The Sarcosinate creates these tiny, dense bubbles that feel much more luxurious than the big, “air-filled” bubbles of cheap shampoos.

  2. The pH is King: I was very careful to bring the pH down to 5.5. In my experience, this is the magic number for keeping the hair shiny and the scalp calm.

  3. The Mixing Process: I mixed the surfactants together first before adding them to the water. I found that if I poured the water onto the surfactants, I ended up with way too many bubbles in the beaker. Slow and steady wins the race! :D

  4. Scalp Feedback:

    The most amazing thing happened when I checked the pH. I brought it down to 5.5 with Lactic Acid, and suddenly the texture became so beautiful and dense! I realized that you don’t need SLES to get a rich foam. The foam from the Sarcosinate is tiny and creamy—it feels like washing your hair with a cloud instead of a detergent.

    I didn’t get any of that “squeaky” feeling that usually means the hair is dying for help. Instead, my scalp felt calm for the first time in weeks. It’s a huge win for me! However, to be fair, I don’t love the feeling in my hair, the wetting ability is not so good and so the search for the perfect shampoo is still open for me! Hope you enjoyed my experiments 😀

No Sles Shampoo 1

No Sles Shampoo 2

No Sles Shampoo 3

No Sles Shampoo 4

No Sles Shampoo 5

No Sles Shampoo 6

Aloe Vera Face Cream DIY

LAB NOTES & SAFETY NOTICE
For educational purposes only. Content reflects personal, non-professional formulation experiments and is not instructional.
No formula or information on this site is intended for commercial use, consumer application, or third-party use.
Accessing this content means you accept all risks and full responsibility for safety, testing, legal compliance, and outcomes.
[Full Legal Disclaimer & Safety Requirements]

Aloe Vera Cream Cover

In this experiment I tried to formulat a soothing, matte-finish cream designed for skin that is no longer in an active acne phase but remains sensitive and prone to congestion. I tried creating a “grease fall” that would use butters which don’t melt so easily and don’t spread on the skin like, let’s say, coconut butter.

The Technical Highlights

The “Dry” Lipid Profile (Grease Fall)

To achieve a matte finish and avoid a “heavy” skin feel, I utilized a strategic blend of lipids:

  • The “Dry” Butters: Kokum and Murumuru butters provide structural richness but possess a high stearic acid content, which leads to a “dryer” finish on the skin compared to Shea or Cocoa butter.
  • Non-Comedogenic Oils: Safflower, Black Currant, and Cranberry seed oils are high in linoleic acid. In my records, I prioritize these for acne-prone skin as they help balance the skin’s sebum composition.
  • Cetiol Sensoft: A lightweight synthetic ester used to enhance the “slip” and provide a professional, elegant texture without greasiness.
Phase Component % / grams Function
A Distilled Water to 100 Solvent
A Glycerin 4.0 Humectant
A Xanthan Gum 0.25 Stabilizer
B Methyl Glucose Sesquistearate 3.0 Emulsifier
B Cetyl Alcohol 1.8 Co-emulsifier / Thickener
B Kokum & Murumuru Butters 1.0 / 1.0 “Dry” Butters
B Vitamin E / Cetiol Sensoft 0.5 / 0.5 Antioxidant / Emollient
C1 High-Linoleic Oil Blend 2.0 Nutrient Lipids (Cold Phase)
C1 Bisabolol 0.5 Soothing Active
C2 Hyaluronic Acid (1% Gel) 3.0 Hydration
C2 D-Panthenol / Allantoin 1.0 / 0.4 Healing / Anti-irritant
C2 Silk Hydrolyzed Proteins 2.6 Conditioning
C2 Aloe Vera Powder (200:1) 0.5 Concentrated Soothing
D Preservative / Fragrance 1.0 / q.s. Protection / Aesthetic

Notes from my Beaker:

  1. The Aloe Choice: I used a high-quality Aloe Vera juice/gel. You have to be careful with Aloe because if you use the “ready-made” gels from the store, they already have thickeners in them that can mess up your emulsion. I prefer the liquid version so I can control the texture myself.

  2. The Emulsion: I heated Phase A and Phase B to about 70°C. When I combined them, I used my mini-mixer for a few minutes until it turned into a beautiful, snowy white cream. It’s so satisfying to watch it thicken as it cools!

  3. The pH Check: As always, I made sure to check the pH once it cooled down. Keeping it at 5.5 is the “sweet spot” for my skin to stay happy and the barrier to stay strong.

  4. The Feel: This cream has a “velvet” finish. It sinks in quickly but you can still feel that the Aloe is there, keeping the skin hydrated and plump.

Final Verdict: This has become my go-to “emergency” cream for whenever my skin feels a bit sensitized. It’s simple, it’s cooling, and it works! It’s amazing what a difference a good amount of Aloe can make. ENJOY! 😀

Aloe Cream

Q10 Antioxidant Face Cream DIY

LAB NOTES & SAFETY NOTICE
For educational purposes only. Content reflects personal, non-professional formulation experiments and is not instructional.
No formula or information on this site is intended for commercial use, consumer application, or third-party use.
Accessing this content means you accept all risks and full responsibility for safety, testing, legal compliance, and outcomes.
[Full Legal Disclaimer & Safety Requirements]

Q10 Antioxidant Face Cream DIY

Lab Note: My “Antioxidant Network” Experiment!

Hello Hello! 😀 Today I am so excited to share an experiment that is a bit “brainy” but so cool! I call it the Antioxidant Network. Usually, we just pick one “hero” ingredient like Vitamin C, but I wanted to try something different. I wanted to build a team!

The idea is the Redox Theory—it’s like a relay race for your skin. When one antioxidant gets “tired” from fighting free radicals, the others step in to “recharge” it so the whole system keeps working. It’s synergy in a jar! yeheee! 😀

The Team Members:

  • Coenzyme Q10: The energy booster! It gives the cream a lovely yellow tint.

  • SAP (Vitamin C): I used Sodium Ascorbyl Phosphate because it’s way less “grumpy” and irritating than pure Vitamin C.

  • Alpha-Lipoic Acid (0.5%): The “Universal” antioxidant. Warning: This stuff has a “Hell-Smell” of its own—it’s very sulfuric! I only used 0.5% because I wanted the benefits without smelling like a matchstick factory. 😛

  • Vitamin E: To protect the oils and the skin’s lipids.

The Emulsifier “Fuss”: Hitecream 3000

I played with Hitecream 3000 for this one. It’s a vegetable, protein-based emulsifier that’s supposed to be super skin-compatible. I used it at 7% on its own. It gave a stable cream, but next time I might drop it to 5% and add a bit of Cetyl Alcohol to make the texture feel a bit more “posh.”

The Formula I Used:

Phase A:

  • Distilled Water: to 100

  • Glycerin: 2.0

  • Carbopol Ultrez 21 / Xanthan: 0.3 / 0.2 (My hybrid gelling system!)

Phase B:

  • Hitecream 3000: 7.0

  • Kokum & Murumuru Butters: 1.5 / 1.0 (Love my dry butters!)

  • Dicaprylyl Ether: 1.5

  • Tocopherol (Vitamin E): 1.0

Phase C (The Antioxidant Cold Phase):

  • Safflower & Ribes Nigrum Oils: 0.5 / 0.5

  • Q10 / Alpha-Lipoic Acid: 0.1 / 0.5

Phase D (The Finishing Touch):

  • SAP (Vitamin C): 1.0

  • Rose Water: 10.0 (To dissolve the SAP)

  • D-Panthenol / Preservative: 1.0 / q.s.


Notes from my Beaker:

  1. The “No-Stir” Trick: For the Carbopol Ultrez 21, I just let it float on the water until it hydrated itself. No clumps, no stress! Then I added my Xanthan-Glycerin slurry.

  2. Heat it Up: Hitecream needs to hit 70°C to wake up and start working.

  3. The Cooling Phase: I was very careful here. I pre-dispersed the Q10 and that stinky Alpha-Lipoic acid in the cold oils (Phase C) and only added them when the cream was cool. I also dissolved the SAP in Rose Water before stirring it in.

  4. The Look: The Q10 makes it a pale yellow, but I added one drop of food colorant just to make it look “fresh” and pretty on my vanity.

Final Verdict: The synergy between the SAP and the Q10 really made my skin look vibrant! Even with the slight “sulfur” hint from the Alpha-Lipoic acid, I really liked how this cream performed. It feels like a high-tech shield for the face! ENJOY! 🙂

Water in Cosmetic DIYs

LAB NOTES & SAFETY NOTICE
For educational purposes only. Content reflects personal, non-professional formulation experiments and is not instructional.
No formula or information on this site is intended for commercial use, consumer application, or third-party use.
Accessing this content means you accept all risks and full responsibility for safety, testing, legal compliance, and outcomes.
[Full Legal Disclaimer & Safety Requirements]

Water

Aqueous Phase Standards & The “Water to 100” Logic

In my formulation studies, water is the most voluminous and technically volatile component. Because water supports microbial life, its purity and the logic behind its calculation are the primary safeguards for a stable product.

1. The Purity Hierarchy: Beyond the Tap

The choice of water is not negotiable. Standard tap water contains minerals (electrolytes) and metal ions that can destabilize emulsions and deactivate preservatives.

  • Demineralized Water: Free of minerals that interfere with electrolyte-sensitive ingredients (like Carbomers or specific emulsifiers).

  • Microbiologically Pure Water: Required to ensure we aren’t introducing bacteria or fungal spores into the batch.

  • The “Boil and Hold” Protocol: If commercially distilled, sterile water is unavailable, I utilize a high-heat mitigation strategy. I boil demineralized water for at least 20 minutes to reduce the bio-burden. This does not guarantee 100% sterility, but it significantly increases the efficacy of the final preserving system.

2. The “Heat and Hold” Method

When executing heated emulsions, I often utilize the Heat and Hold technique. This involves maintaining both Phase A (Aqueous) and Phase B (Lipid) at 70°C–75°C for 20 minutes.

  • Objective: To ensure all high-melting-point waxes are fully integrated and to provide a secondary thermal “kill step” for potential pathogens in the water phase.


3. The Mathematical Protocol: “Water to 100”

In professional formulation, we work exclusively in Percentages (%). This ensures that the concentration of active ingredients and preservatives remains constant, regardless of the batch size or substitutions.

Why we calculate water last:

By listing water as “Water to 100,” we treat it as a flexible solvent. If I decide to increase an active ingredient from 1% to 2%, I do not reduce my preservative; I simply reduce the water. This maintains the integrity of the chemical ratios.

Example Calculation: If a formula requires:

  • Gelling Agent: 1.5%

  • Preservative: 0.5%

  • Actives: 3.0%

The math follows:

If I substitute a gelling agent that requires 3.5% for the same viscosity, the math updates automatically:

Result: The preservative remains at exactly 0.5% of the total mass, ensuring the product remains safe.


Researcher Summary

“Water to 100” is the language of the cosmetic chemist. It allows for agility in the lab—permitting substitutions and adjustments without compromising the safety or performance of the final cosmetic. Remember: Where there is water, there must be a preservative.

Silicones in cosmetics – the truth

LAB NOTES & SAFETY NOTICE
For educational purposes only. Content reflects personal, non-professional formulation experiments and is not instructional.
No formula or information on this site is intended for commercial use, consumer application, or third-party use.
Accessing this content means you accept all risks and full responsibility for safety, testing, legal compliance, and outcomes.
[Full Legal Disclaimer & Safety Requirements]

Silicones

Silicone Chemistry — Performance, Breathability, and Sustainability

In the modern cosmetic landscape, silicones (organosilicon compounds) are often misunderstood. My research objective was to evaluate these molecules based on their technical performance, their interaction with skin physiology, and their environmental impact.

1. Performance Theory: The “Velvet” Effect

Silicones are utilized in high-end formulations not because they are “cheap fillers,” but because they offer a unique sensory profile that natural oils cannot replicate.

  • Surface Tension: Silicones have very low surface tension, allowing them to spread easily and create a “dry-touch” silkiness.

  • Stability: Unlike natural vegetable oils, silicones are highly resistant to oxidation and heat, making them excellent carriers for chemical UV filters and pigments.

  • The “Illusion” of Health: While silicones provide an immediate smoothing effect, it is critical to distinguish between aesthetic improvement and biological hydration. Silicones do not “nourish” the skin; they provide a temporary protective and perfecting film.

2. The Breathability Myth: Pore Clogging (Comedogenicity)

The claim that silicones “suffocate” the skin is largely unsupported by molecular science.

  • Molecular Size: Most silicones are large, stable molecules that sit on top of the Stratum Corneum. Because of their unique “staggered” molecular structure, they are generally permeable to oxygen and water vapor.

  • Viscosity Variations: * Volatile Silicones (e.g., Cyclopentasiloxane): Evaporate quickly, leaving a weightless finish.

    • Non-Volatile Silicones (e.g., Dimethicone): Heavier and more occlusive. While technically non-comedogenic, their “film-forming” nature can trap sweat or sebum underneath in certain skin types, which may lead to breakouts for individuals like myself.


3. The Sustainability Concern: Environmental Persistence

While silicones are safe for human topical application, their environmental “footprint” is significant.

  • Origin: Derived from Silica (Sand), not petroleum.

  • Biodegradability: The very stability that makes silicones excellent for formulation makes them problematic for the planet. They are largely non-biodegradable. Once washed down the drain, these molecules persist in the ecosystem for decades.

  • Researcher Stance: As formulators in 2026, we must weigh the aesthetic benefits of silicones against their long-term environmental persistence.


4. Hair Care: The “Build-Up” Phenomenon

In hair care, silicones function as high-performance conditioning agents.

  • The Benefit: They coat the hair shaft, smoothing the cuticle and reducing friction (easier combing).

  • The Downside: Over-use of heavy silicones can lead to “Build-Up,” where the layer becomes too thick, making the hair appear lank and heavy. In my formulas, I limit silicone inclusion to 1% to achieve “slip” without the weight.


Researcher Summary

Silicones are neither “miraculous” nor “dangerous.” They are sophisticated tools for texture manipulation. In medical settings, their stability and low allergenicity make them ideal for scar treatment and wound care. In cosmetics, they are the key to the “velvet” finish.

My Lab Philosophy: Use silicones intentionally for performance (e.g., in foundations or high-slip conditioners), but do not rely on them as a substitute for genuine skin-nourishing actives like Niacinamide, Panthenol, or Linoleic-rich oils.

Caffeine & Escin Eye Cream DIY

LAB NOTES & SAFETY NOTICE
For educational purposes only. Content reflects personal, non-professional formulation experiments and is not instructional.
No formula or information on this site is intended for commercial use, consumer application, or third-party use.
Accessing this content means you accept all risks and full responsibility for safety, testing, legal compliance, and outcomes.
[Full Legal Disclaimer & Safety Requirements]

Escin and Caffeine Eye Cream

Lab Note: My “Dusty” Escin Eye Cream Experiment

Hello Hello! 😀 Today I’m looking back at a formula that required a very steady hand and a bit of patience. I wanted to create a treatment specifically for the delicate eye area, focusing on puffiness and those tired mornings. yeheee!

The star of this experiment was Escin (the active from Horse Chestnut). If you’ve worked with it, you know it’s a very fine, “dusty” powder that can be a bit of a diva to incorporate. But it’s so worth it for its ability to support microcirculation! I also included Caffeine to give the skin a little “wake-up call.”

The Formula I Used:

Phase A:

  • Distilled Water: to 100

  • Glycerin: 2.0

  • Caffeine: 0.5 (I dissolved this in the hot water phase)

  • Xanthan Gum: 0.2

Phase B (The Light Lipid Phase):

  • Methyl Glucose Sesquistearate: 3.0 (My reliable emulsifier)

  • Cetyl Alcohol: 1.0 (Just a little for stability)

  • Argan Oil: 3.0 (Rich in Vitamin E but not too heavy)

  • Rice Bran Oil: 2.0

  • Shea Butter: 0.5 (Just a tiny touch for creaminess)

Phase C (The Active Cold Phase):

  • Escin: 1.0 (The “dusty” hero!)

  • Cornflower Water (Hydrolat): 10.0 (Soothing for the eyes)

  • D-Panthenol: 1.0

  • Tocopherol (Vitamin E): 0.5

  • Preservative: (According to my usual lab choice)


Notes from my Beaker:

  1. The Caffeine Trick: I made sure to add the Caffeine to Phase A while the water was hot. It dissolves much better that way, so you don’t end up with any “crunchy” bits in your eye cream!

  2. Handling the Escin: This was the trickiest part. Escin is very light and dusty. I found that pre-mixing it with the Cornflower Water in Phase C to create a smooth slurry made it much easier to fold into the emulsion without it flying everywhere!

  3. The Texture: Because it’s for the eyes, I wanted it to be light. The combination of Argan and Rice Bran oil makes it sink in quickly so it doesn’t mess up my concealer later.

  4. pH is Critical: For the eye area, I was extremely careful to check the pH. I kept it right at 6.0 to 6.5. Our eyes are much more sensitive to acidity than the rest of our face, so “neutral” is the way to go here.

Final Verdict: I’ve been using this in the mornings, and I really notice a difference in how “awake” my eyes look. The Escin and Caffeine duo is like a double espresso for the face! It’s a bit of a “picky” formula to make, but the results are so elegant. ENJOY! 😀

Escin and Caffeine Eye Cream14

Hyaluronic Acid Serum for Problem Skin

LAB NOTES & SAFETY NOTICE
For educational purposes only. Content reflects personal, non-professional formulation experiments and is not instructional.
No formula or information on this site is intended for commercial use, consumer application, or third-party use.
Accessing this content means you accept all risks and full responsibility for safety, testing, legal compliance, and outcomes.
[Full Legal Disclaimer & Safety Requirements]

Hello there! 😀

Hyaluronic Acid Serum for Problem Skin

Lab Note: My “Problem Skin” Niacinamide Serum

Hello Hello! 😀 Today I’m looking back at a formula for a super simple but highly effective serum. I designed this one specifically for those “problematic skin” days—you know, when you have a bit of an oily T-zone, some mild blemishes, and maybe those annoying red marks left over from previous spots.

I have to remind myself: this isn’t a “magic cure” for serious acne. It’s just a helping hand to keep the skin hydrated and soothe that irritation. yeheee!

The Niacinamide “Trick”

The star here is Niacinamide (Vitamin B3). It’s a powerhouse for sebum and redness, but it has a secret: it’s a close friend of Nicotinic Acid. If the pH drops too low, the Niacinamide can turn into Nicotinic Acid, which causes flushing and burning—the exact opposite of “soothing!”

Because of this, I was incredibly “fussy” about the pH in my lab. My goal was a safe pH of 6–6.5. At the time, I was using the most reliable pH strips I could find, though a pH meter is definitely the “gold standard” for this!

The Formula I Used:

  • Water: to 100
  • Niacinamide: 4.0 (The blemish fighter)
  • Aloe Vera Powder (200:1): 0.5
  • Betaine (Trimethylglycine): 5.0 (The soothing powder—not the surfactant!)
  • Glycerin: 1.0
  • Sodium Hyaluronate: 0.9 (Used here as the “gelling agent” and for deep hydration)
  • Preservative: 1.0 (I used my Ecocert approved one)
  • Extras: A drop of green food-grade colorant and a hint of fragrance.

Notes from my Beaker:

  1. The Base Mix: I started by dissolving the Aloe, Glycerin, Betaine, and preservative into the water.
  2. The pH Balancing Act: This was the most important part. When I first measured the mix, the pH was a bit low (under 5.5). Since I didn’t want to play with Sodium Hydroxide that day, I used a clever trick: I added a tiny bit of SAP (Sodium Ascorbyl Phosphate). It’s a stable Vitamin C that is quite alkaline, so it raised my pH perfectly into that 6–6.5 “safe zone” for the Niacinamide.
  3. Adding the Active: Once the pH was stable, I stirred in the Niacinamide. And yes… I checked the pH again! You can never be too sure when you’re avoiding that Nicotinic Acid flush.
  4. The “Patience” Test: I poured the Sodium Hyaluronate on top. Usually, you’re supposed to just “forget about it” for a day while it hydrates into a gel. But since I have zero patience :D, I hit it with a spatula and then my immersion mixer. It worked like a charm!
  5. The Aesthetics: I added one drop of green colorant because it just felt “right” for a soothing aloe-based serum.

Final Verdict: Even though it was a bit of a “fuss” to keep the pH exactly right, the result was a serum that felt incredibly smooth. It didn’t feel sticky, and it really helped keep my T-zone in check without any of that scary flushing. ENJOY! 🙂

Niacinamide6

Niacinamide7