Formulating a lotion: Fatty Acids and ACNE

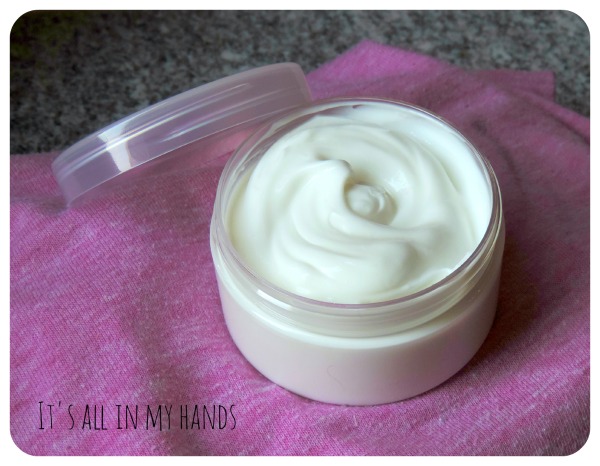
In the last post we learnt about the GREASE-FALL, which is “how to distribute the fats in order to obtain a specific kind of cream”.

In this post we are going to go a step forward: we will learn about the fatty acids inside the natural fats (oils or butters). This will help you formulate keeping an eye specially to acne problems.

Choosing Butters and Oils

There are many fatty acids in oils and butters.
The most common ones can be divided in this way:

1) Saturated fatty acids:
– palmitic acid
– stearic acid
– lauric acid

2) Monounsaturated fatty acids
    – palmitoleic acid
    – oleic acid

3) Polyunsaturated fatty acids
    – linoleic acid (more famous as Omega-6)
    – alpha-linolenic acid (more famous as Omega-3)

 Saturated fatty acids are found mostly in butters (the high presence of saturated fatty acids, which are fatty acids that like to sit very close next to each other, makes the butters be solid at room temperature! 😉 ) and they determine the density of an oil.
Saturated fatty acids tend to create deposits and this might happen also on the skin. However, if they are in low percentage, there is no problem in the formulation. 🙂
Stearic Acid, as a lone substance, is also used as a thickener in creams and sometimes soaps; its presence however helps the formation of the unfamous white-trail, therefore do not use too much butters which contain this fatty acid in high percentage or there is a higher risk that your cream will make the white-trail on the skin! 🙂 But don’t worry too much: the quality of the cream, however, won’t change 😉
Lauric Acid has been claimed to have antimicrobial properties.

Now to the more interesting (for our skin) Unsaturated fatty acids, if you know a little bit of Chemistry you will already know that the shape of UNsaturated fatty acids makes it difficult for them to sit close close to each other, like the saturated fatty acids. This is why the oils, which contain mostly Unsaturated fatty acids, are liquid at room temperature 🙂
Within the category of Unsaturated fatty acids we find Monounsaturated (therefore Oleic Acid and Palmitoleic Acid) and Polyunsaturated fatty acids (linoleic and alpha-linolenic acids).

The biggest difference in the oils we use in cosmetics is usually the ratio of saturated, monounsaturated and polyunsaturated fatty acids, so most of the times when an oil is marketed as “something special”, well it often isn’t. For example almond, macadamia, hazelnut oils have a very different cost but their fatty acid composition is quite similar. So before you purchase an oil thinking that it will do something magic, take a moment and look up the fatty acid content of the oil, to be sure that it is not too similar to a much cheaper one!
I know it is tempting to think that the oil of the rarest variety of some extremely exotic plant will finally be your skin-changer… but if you have been sticking around this blog enough, you should know by now that I rarely believe in skin-changing ingredients (there are some effective ones, but the slightly different composition of an oil won’t do the trick) 😉 so do always look up the fatty acid content (and then buy the oil anyway, if you really want to, but at least knowing what you are buying!).

Now, to the correlation between fats and acne:
some studies have checked the sebum production of people with and without acne and apparently people who suffer of acne tend to have a higher percentage of monounsaturated fatty acids compared to the polyunsaturated ones.
Applying more monounsaturated fatty acids (specifically the oleic acid) to the skin might create some problem is this case: it tends to increase the percentage of Ca2+ on skin, which leads to higher keratinization. This can cause even more acne problems.

It is worth considering this disparity in the sebum production when we formulate a cream for somebody who suffers of acne.

The idea is to learn about the fatty acid concentration of our oils and butters to be able to add in our “grease fall” ingredients with a higher concentration  of polyunsaturated compared to monounsaturated ones.

A practical example: I use very low percentage of butters (0.5-1%, but even this small amount is needed for the consistency of the cream) and then, when I have to pick the oils, I pick them with different densities but I make sure that they are low in Oleic and Palmitoleic Acids, while they are rich in Linoleic and Alpha-Linolenic Acids. This is what I have done and so far and I have had good results 🙂

Online you can very easily find data about even the most exotic oils: both on their density, spreading ability and content of fatty acids.
Here I will just sum up very briefly which oils have relative higher content of linoleic and alpha-linoleic acids:
Black currant oil
Borage oil
Cucumber oil
Grape seed oil
Hemp oil
Primrose oil
Raspberry oil
Passion fruit oil
Safflower oil
Sunflower oil – this is the cheapest option
Soy oil

There are also a few butters that, compared to other butters, seem to have a slightly lower content of oleic acid, for example Murumuru butter, Coconut oil and Tucuma butter.
However butters don’t have high content of polyunsaturated fatty acids (or they wouldn’t be butters anymore, as I explained before).

Hope this was helpful! 🙂
I am sure there would be more and more things to tell about fatty acids but maybe in a future post.

Have a great day! 😉

Formulating a lotion: Choosing the fats – THEORY pt.5

[Actually the title of this post should be CHOOSING THE FATS / THE SECRET OF THE GREASE-FALL!] 🙂

You have learnt which percentage of fats your cream should approximately have, according to what kind of lotion you want to create; now it is time to learn how to distribute the fats within the percentage you have chosen.

The choice of the fats and their percentage in the formula is of big importance because mostly from them depends the touch of the cream: the more you know about them, the better you will be able to formulate. But let me explain how 😉

I will talk firstly about the OILS, and later on I will briefly talk about butters and waxes.
When talking about oils (but this goes also for other fats) you do not want to look much at their so-called “miraculous” properties (I won’t repeat this often enough!); what you want to look at, instead, are their technical qualities:
– density,
– spreading ability,
– feeling on the skin/absorbing ability of the skin.

– fatty acids composition.

[Note: on the internet you can find slightly different data from what I am reporting here: mine is my personal sum up and what I believe to be the most correct data. You are free to make a research on your own and give more value to different data you find 🙂 ]

Density – tells us, surprise surprise, how dense an oil is. For example castor oil (dens. 0.96) is one of the most dense oils, while jojoba oil (to be very precise it is not actually an oil, it is an ester… but let’s think of it as an oil for now 🙂 ) is one of the least dense (dens. 0.869).
Spreading Ability – this concerns how the oils spread on the skin. Don’t be mistaken however thinking that the spreading ability will tell you which oil has a light impact on the skin: an oil can spread very lightly and, at the same time, give a greasy touch. How? Well, the spreading ability tells you how the oil, when spreading it on the skin, is going to feel like: if an oil is very dense it will feel like you hardly manage to spread it, a medium oil will spread quite nicely and leave quite a good feeling in the end, while a light oil will most likely spread very fast and, at some point, you will feel as if it actually disappeared (don’t be mistaken by this: very light oils are very likely to, after 5 or 10 minutes, appear again on your skin leaving you with a greasy face 🙂 ). Now I will give you some data examples: wheat germ oil is DD (very dense) which means it doesn’t spread much but it is quite a “thick” oil; peanut oil is classified as D (dense), meaning that it doesn’t spread very easily; olive oil is classified MD (medium density); Almond oil is classified as M (medium spreading ability); Borage oil is Fl-M (fluid-medium: spreads a little bit better than a medium oil); primrose oil, instead, is classified as Fl (light-fluid) and sunflower oil, eventually, is classified L (light).
Absorbing ability on the skin – As I was just pointing out, some oils “show back” on the skin even if in the beginning they spread so well that you thought they had disappeared 🙂 what we really need to know, in terms of what is going to show on the skin, is how do these oil absorb on the skin. I will bring some examples again: wheat germ oil – greasy; borage oil – a little greasy; macadamia nut oil – oily feeling; almond oil – oily feeling; olive oil – oily feeling; argan oil – medium; jojoba oil – good absorption; sunflower oil – good absorption.
[These factors can be said also about synthetic oils.]

Fatty Acid Composition deserves a bigger discourse and it is not too important for the explanation of the GREASE-FALL, so it has its separate post.

Now finally… THE GREASE-FALL   🙂

You have learnt that oils and butters are different in composition and in how they behave on the skin. But how to use this information when we have to formulate?
Well, imagine you have a rather oily face and you want to create a cream for it. You want a light cream, easy to spread and absorb… and you don’t want it to make your skin greasy at all. If you didn’t read what I just said about the spreading ability I am sure you would think “I will make a cream with light density oils!”.
Well… and that would be SO WRONG! 🙂 The cream would spread even too easily, it would feel fresh in the beginning but after 5 minutes you would be all oily once again.
And imagine you have a very dry skin and you would like to have a very rich cream: probably you are thinking to make it only with fats like, let’s say, shea butter… am I wrong? It’s a rich butter, it has high vitamin E content… nothing could be better than that.
Well… WRONG AGAIN 🙂 you would get a cream which is not nice to spread, leaves your skin white unless you try to spread it nicely and you wouldn’t feel hydrated as you wish.
So what is going wrong?
Well, it’s very simple said: you are not formulating a GREASE-FALL, you are just adding oils randomly! 😀

So what is this bloody GREASE-FALL RULE:
whenever you start formulating a cream and you are clear which purpose you want it to have, you have to balance the different kinds of fats! Every cream, to be a good cream, need all the kinds of fats!
So how to differentiate a light cream from a thick cream for dry skin?
This is the magic of the grease-fall rule. 🙂 The idea of using shea butter for dry skin is not bad, but you will have to add also all the other densities; let me show you an example:
let’s say our dry-skin cream will have a percentage of 12% fats, you can organize the fats like this:
1% beeswax (for example, very high in density and low spreading ability. Gives richness to the cream. Never exceed with waxes though)
6% shea butter (you could also do 2% mango butter and 4% shea butter… the point is to keep butters at 6% because they are more emollient than most oils)
3% argan oil (medium to rich oil)
1% borage oil (medium)
1% jojoba oil (very light)
This is just an example which I “invented” exactly now and I am sure I could do better but, once you get the grip of it, you will love changing and experimenting on your own, so don’t give too much importance to this; it is just to give you an idea of how to create a balanced grease-fall: you put the highest amount of what you need and then, like in a rough gaussian distribution, you add everything else in minor amount.
So here is an example of a grease-fall for oily skin:
let’s say we will make a cream of 5% fats (with 5% it is not easy to make a good grease-fall and it is also quite hard to tell the difference in a cream 🙂 but we try to be professional no matter what 🙂 ok? )
2% jojoba oil (or, if you want to use synthetic oils, there are some which are much lighter than jojoba oil: for example dicaprylyl ether. Always bear in mind that even if they are very light, if you use too much, they will show up again on the skin)
1.5% sunflower oil (light)
1% black currant oil (medium-light)
0.5% shea butter
As you can see the shea butter is extremely low in % but still it will help the cream to be more balanced in the end 🙂

I hope I managed to be clear enough about this matter because it is an important one! 🙂
Let me know if you have any questions! 🙂

Formulating a lotion: Phase B – THEORY pt.4

The Phase B is the “oily phase” or the “heated oily phase”.
It contains the emulsifier or the emulsifiers if they are two, the thickeners (if needed) and all the oils and fats which do not get negatively affected by heat (this because 90% of the times the Phase B is heated up to 70°C).

– EMULSIFIERS:
There are many kinds of emulsifiers. I will create a dedicated post about them. The main difference regard to the formulation of a lotion/cream is that some need to be heated up to 70°C and others don’t need it. The highest number, however, need to be heated to create a stable emulsion; this is why the Phase B is called also the “heated oily phase”: because most of the time it is heated.

THICKENERS:
Thickeners are those ingredients which give consistency to the cream and also help keeping the emulsion stable; the most common are cetyl alcohol, stearic acid, cetylstearic acid). Some are even slight emulsifiers themselves (for example cetyl alcohol which is a lipophilic emulsifier: it means that it is “fat-loving” emulsifier which can emulsify a small small quantity of water into a large quantity of fat).
Thickeners are solid (usually they are in pearls) and need to be heated in order to melt with the other ingredients.
In a formula you should add around 1% of thickeners and you can choose to add only one kind or two kinds. I personally like the combination of 0.5% cetyl alcohol and 0.5% cetearyl palmitate. You should do experiments to find out which consistency each thickener gives to a cream, in order to be able to choose what you like the most. 🙂
Pay attention, however, that while most of the emulsifiers do not contain thickeners in their formula, some do. It is the case, for example, of Montanov 68 (this is one of its commercial names) which is: “cetearyl alcohol, cetearyl glucoside”, where the cetearyl alcohol is our co-emulsifier and thickener, the cetearyl glucoside is the emulsifier. In this case you should not add any extra thickener to your cream-formula or it would result in a very lumpy cream difficult to spread.

THE FAT (finally) 🙂 :
Before you start formulating a lotion you obviously need to know what is going to be its purpose: is it a cream for body, face or feet/hands? And, if it is for face, is it for normal skin, dry skin or oily skin?
Once you know what kind of cream you are planning to do, then you can start formulating.
Here is a short guideline on the percentage of fats you should add to your cream according to its purpose.
Keeping in mind that in any cream the fats should never go over the 25% fats (I am talking about O/W creams, about W/O it’s a different story but that will require another post) these are the values:
0-2% – it is obviously not a lotion but it is a gel: good for oily skin in summer days.
2-4.5% – this could be considered a oil-free lotion because the percentage of fats is so low. Good for oily skin.
4.5-7.5% – good for a cream for oily skin in winter days or normal skin in summer.
8-12% – good for normal skin
12-15% – good for dry skin
15% – light body cream
20% – medium weight body cream
25% – good for a rather thick body cream, hand cream and foot cream!
All these values can be changed a bit, according to what is your purpose: they are not fixed values but they give the idea 🙂

How to decide which oils and butters should go in your lotion?
On the market there are tons and tons of oils and buttes, some are natural, nowadays it is fashionable to use exotic oils 🙂 and some are synthetic.
Probably the first thing you would do is to add any kind of oil which sounds good to you: “Oh I read somewhere that the oil of khtululu (I invented this plant 🙂 I am just trying to make a point) is very good against skin-aging, it has miraculous antioxidant properties and, if used everyday, it will also prepare the breakfast for you in the morning!!! I will make a cream with 7% fats using 5% this oil and 2% turururu oil, which is a very rare, I will just sell my kidney to have it but you see it is found only on the Everest peak in 100 ml jars and it is said to be marvelous for firming the skin…”
Let me say NO NO NO NO NO and NOOO 😀
There is one thing that you will happily or sadly learn while learning to make lotion-creams: nothing is miraculous and it is not true that the more one thing costs, the more it is effective. That is just what market wants us to believe. 🙂 And, if you study well enough (even on your own, doing some research), you will realize that most of the times we are just being fooled 🙂 .

There are some rules which need your attention when deciding which fats to add in your formula and these rules concern the density, viscosity, spreading ability of your oil more than the so-called miraculous properties. I will never repeat this too many times.

So the new post will be only about the oils and how to formulate a group of oils in the cream, how to choose them, what to look for and so on 😀

(Sources)

Formulating a lotion: Phase A – THEORY pt.3

Here I will be more specific about formulating a lotion.

As I already said the PHASE Aalso called “water phase” or “heated water phase”, is the first step to the making of our lotion/cream.
It is mostly heated even if actually it all depends on the other ingredients we are using: the point is that most emulsifiers need to be heated to 70°C and to emulsify it is needed that waters and fats, read “phase A and phase B”, are also both heated up to this temperature. So usually phase A is heated in a double boiler up to 70°C at the same time of phase B.

What does the phase A contain? 

– WATER.
Any lotion should contain at least 70% water (there is a post on water HERE).
You could also use herbal hydrosols (which doesn’t mean “herbal infusion”) but anyway bear in mind that these waters are mostly expensive and do not have so great properties (IMO better you save your money to buy active ingredients 😉 ).

GLYCERIN
Glycerin is highly hygroscopic, which means that has the ability to attract and hold water molecules very very tight 🙂
This will be the “magic ingredient” which won’t let your lotions become dry after few days you opened them but will actually keep them moisturized.
As you can imagine, the fact that it is so highly hygroscopic is not only a “plus”: if, for example, you add too much glycerin to your face cream you can be sure that after a couple of hours your face will look bit shiny/oily.
So, the percentage of use is 1.5-5% (1.5% should be the minimum, used for example in creams for oily skin; 2-3.5% is for normal to dry skin; 4-5% is for body lotions).

GELLING AGENTS
Gelling agents help the lotion to be slightly more firm but mostly they are used to keep the emulsion more stable (only with a small small number of emulsifiers you should avoid using them).
There are many gelling agents, I am going to speak of those I have used:
xanthan gum, there is of two kinds: normal and transparent grade (which gives a transparent gel): it gives a very slimy gel which doesn’t have the best consistency but it is a great gelling agent which does not “melt down” even if you add a high percentage of “salts” (just keep reading 🙂 ). If you use too much it creates a “film” in your skin and it makes you sweat.
If it is the only gelling agent you have, you could use it at 0.2-0.35%; the best, however, would be to use it as a stabilizer of another gelling agent (the next one for example).
How to use it: I usually take the phase A becher and add the glycerin, then add the xanthan gum and mix with a spatula. When it looks dispersed I add the water little at a time. If you incorporate air while mixing just let the gel rest and the bubbles will go.
Here is a picture of glycerin with xanthan gum just poured on top:
Xanthan Gum Glycerin
carbopol ultrez 21, there are tons of “carbopol…” but I am going to speak of what I know better: I haven’t tried the others well enough to make up my mind about them; what I have read is that carbomers create gels which are slightly difficult to keep stable. This “carbopol ultrez 21” is not too difficult to use and, if you follow some rules, it will give great results.
The bad part is that it is stable only at pH 6: if you rise the pH too much everything will be spoiled and there is nothing you can do to save it. Another bad part is that if you add salts to the lotion, the gel melts down and everything is ruined. When I say “salts” I am not referring to cooking salts (only 🙂 ) but I am chemically speaking, so for example you shouldn’t add too much sodium hyaluronate (hyaluronic acid? 😉 ).
But so why should we use something which could give problems in the formula? Simple: it makes a good gel, it doesn’t give other problems like the white “trail” (? not sure… if somebody can help me with my English I will be glad 🙂 )… I am talking about one thing which happens with certain creams: when you spread it, it doesn’t absorb easily and it actually creates a white “trail”, nothing terrible but still we want to avoid it 🙂 . Anyway, I was saying: this ultrez 21 makes a good gel, good consistency in the cream, good finish… so what to do? Simple! We try to help it to be stable by not leaving it alone!
If you want to leave it alone you can use it from 0.5 to 1%, if you use it with xanthan gum (which is a good stabilizer) then I usually do: 0.2% xanthan gum and 0.3-0.5% ultrez 21.
How to make the gel: if you use it alone just measure the glycerin, add the water, measure separately the ultrez 21 and pour it on top of the water without mixing with a spoon.
Here is a picture:
Water and Carbopol Utrez 21
After a short time it will hydrate and it will “enter” the water: notice that it won’t become a gel immediately but it will rather float inside the water (therefore not making it transparent, like in this picture):
Water and Carbomer after 5 min
At this point you can use an immersion mixer paying attention to not incorporate air, just to make it hydrate more. The water will still be liquid at this time because this carbomer lowers the pH and therefore, not being pH6 yet, it will still be liquid. Don’t worry: add one by one drops of a solution 1:9 of sodium hydroxide and water (one part sodium and 9 parts water) and you will see the water become a gel just in front of you 🙂 . If, instead, you are going to use it together with the xanthan gum then you need to separate the two gels in the beginning: use the xanthan gum as I wrote above but do not add all the water there; in another becher pour the remaining water, add the ultrez 21, wait, mix with the immersion mixer and, before adjusting the pH to 6, mix the “xanthan gel” and the “ultrez 21 water” together. Only now adjust the pH :).
hydroxiethyl cellulose, there are different kinds of this gelling agent, so read the technical card to know at which percentage it should be used. Anyway, according to its density, it can be used from 1% up to 5% (if you are unsure which kind you bought, you can ask your supplier or you can use a middle %: from 1.5 to 2.5% but bear in mind that if you use too much it really becomes too thick). The good thing of this hydroxyethyl cellulose is that it doesn’t have any problem with other ingredients and the gel is not of bad quality either (I don’t love it, but that’s my taste 🙂 also with making lotions you should always try and make up your mind on what you like and what you don’t 🙂 ). The big difference from the other two gelling agents, however, is that it works at 70°C only, so it must be heated. I read different ways of using it, I personally use it this way: I warm up the water in a double boiler, I wait that it reaches 70°C and then pour it while stirring with a spoon (the best would be to have a very small mixer that keeps the water moving while you pour… well, I don’t have it 🙂 ). It becomes a little lumpy (I hope this is the correct word 🙂 ) so after a while I use my immersion mixer paying attention that I don’t incorporate (too much) air. That’s it.

I hope I didn’t forget too much 🙂 Have a good day! 🙂

If you want to add something or explain something better, please share your knowledge 😀

(Sources)

How to make a lotion – THEORY pt.2

HOW TO ACTUALLY MAKE A LOTION/CREAM?

As explained in the “Theory pt.1” post a cream is made of water and oils kept together by emulsifiers (one or more in the same formulation).
So, when you attempt to actually make a cream, you have to start preparing the ingredients separately. There will be at least:

PHASE A: the water based ingredients
PHASE B: the oily ingredients (or oil soluble ingredients)

I think it is better to actually show a very basic recipe of a cream so you can understand what I am talking about.
Every recipe is made for 100 grams of product and every number written after the ingredient indicates the grams (“water to 100” means that the water will be enough to make the recipe reach the 100 gr value)

BASIC BODY CREAM:
Phase A: 
water (demineralized) to 100
glycerin 4
xanthan gum 0.3
Phase B:
fats 15
emulsifier 3 (imagine I have chosen one which need to be heated)
thickener 2

Phase C:
Active ingredients 5
Preservative 0.6
2 drops fragrance oil or essential oil

So what does it mean to “make a phase A and a phase B”?
Once you have the recipe you start weighting the ingredients and you cannot put them all together like an unknown mixture: there are rules to be followed and the most important rule is to keep the two phases separated in the beginning.
So you will need at least two bechers and in one you will add the phase A, in the other you will add the phase B.

The PHASE A usually contains water, glycerin, one or more jelling agents (mainly: xanthan gum, different kinds of carbomer or hydroxyethyl cellulose) which help the emulsion to keep stable and they give consistency to the cream. There are different kinds of jelling agents and each gives a final texture to the cream.

The PHASE B instead contains the oily ingredients and the emulsifier, the thickeners if needed and so on. I have not been specific in this recipe neither for the fats nor for the emulsifiers; this because too much must be said about these two subjects and I will make other posts about this.
What we will consider, however, is that the emulsifier in this cream is one of those which have to be heated at 70°C to actually emulsify water and fats.

So, in this case, now that we have the phase A and the phase B we need to heat them up to 70°C (measuring the temperature is important).
Phase A and Phase B
Once they have both reached the same temperature, you need to add the Phase B to the Phase A (never otherwise) and you have to start mixing them possibly with an immersion mixer (pay attention at this point: avoid incorporating air or it will result in bubbles inside your cream). Notice that when you pour the Phase B into the Phase A you should actually pour it little by little, mix, add some more, mix, add some more… this will give better results! 😀
Phase B in Phase A
Once the liquid (it should still be quite liquid at this point) looks emulsified you have to keep stirring with a spoon until it cools down completely.
When it is cooled down (you will notice that now it looks more like a real cream because it has become thick and creamy 🙂 )
Keep Stirring
this is the time you can add your PHASE C: the preservative, the active ingredients (the ingredients which are extremely good for your skin) and, if you wish to, two drops of your favourite fragrance oils or essential oils (bear in mind that if you want to add fragrance oils they need to be of cosmetic grade: not any fragrance oil will do).
Body cream itsallinmyhands

If it sounded very easy… well it is not really 🙂
I’m not trying to take the motivation away from you, but it is not easy to get a stable emulsified cream; sometimes it gets bubbles inside, sometimes it separates after few days (usually if there are many bubbles it means it is not really emulsified… but I will teach you a trick to get to know if it is emulsified or not). Sometimes things go wrong and you don’t even manage to know why.
So I would suggest that you start reading more and more about how to make creams, also from other websites (I am just summing it up, here… but there are many websites which helped me in learning this wonderful thing so I am sure you can find them interesting also!).
There are so many things to be said about this wonderful subject! 🙂
I feel I forgot to say so much, but I will try to add everything I can to this blog.
Anyway if you decide to study about making creams… ALL THE BEST! 😉 You won’t be left unsatisfied 😀

For various recipes click HERE 
To learn how to formulate cosmetics click HERE
For a list of online cosmetic ingredients suppliers click HERE 

How to make a lotion – THEORY pt.1

Hello! 🙂

Escin and Caffeine Eye Cream14

Right after posting the body-butter recipe I realized it was not good enough and so I started studying and studying how face and body creams are really made.

I have decided to make short posts to explain also to anybody who would like to learn, how they are done in real.

The subject is not the easiest thing, it needs a lot of studying and understanding but I will try to make things as simple as they can be 🙂

A very basic lotion is made of:
– water,

– oils/butters,

– emulsifier,

– preservative.

[Of course there are much more ingredients that  can be added (like active ingredients or thickeners, for example), but I am starting from the basics so learn step by step and everything will be clear! 🙂 ]

Water and oils together give hydration (the water obviously is hydrating, but the oils or butters help the water to not evaporate… plus they give nutriments to the skin; but I will talk about this further on), the emulsifier keeps the water and the oils together 🙂 otherwise they would separate and that wouldn’t be anymore a cream (plus studies says that a cream, read “emulsified water and fats”, hydrate more than separated water and oils; which means that if you shake water and fats together and use them as a cream it will not hydrate you as much as if you made an actual cream with the same ingredients 😉 ).
At last the preservative saves the cream from the proliferation of dangerous bacteria (anytime you use water in something you produce by yourself, you need to use a preservative or you need to save your product in the fridge and use it in a few days only). I don’t know why but people dislike “preservatives” as if they were a terrible thing. They are not: there are many kinds of preservatives, some are eco-friendly (which doesn’t mean that they are like “fresh water”) some are not at all… you can choose accordingly to this, but bear in mind that using a preservative in your products is not an option (if this can make you feel better usually the % of preservative, which changes according to which one you are using, is only around 0.5%).

But now back to the ingredients:

WATER
It must be “demineralized” microbiologically pure water, you should be able to find demineralized water in supermarkets as the water used for ironing. There is a post which explain better on this HERE.
You could also use different kinds of hydrolized flower waters (like rose water, witch hazel…), choosing according to their properties (but keep in mind that many times they are expensive and they don’t have really strong properties… they can be considered more “poetic” than effective, which means that they almost only “sound good” 🙂 ).

BUTTERS and OILS
I am going to make a separate post about the choice of oils and butters because there are definitely too many things to say.
In a cream you should not use just one kind of fat: oils and butters should be balanced and chosen accordingly to the kind of cream you want to make, the purpose it has, the touch you want it to have… it’s not a matter of  so called “miraculous” properties (actually the more you will study “how to make a cream” the more you will realize that NOTHING IS MIRACULOUS… but maybe I should make another post about this also 🙂 ), it is a matter of viscosity, density, feeling at the touch, spreading ability.
To make it very short: there are some rules you have to follow in order to make a balanced “fall” of fats in your cream.

EMULSIFIERS
Also the emulsifiers will have their own post.
Emulsifiers can be very different from one another: some must be heated until 70°C to work, some cannot be heated at all or they don’t work (so according to this difference you will have to change how you make the cream… you will see how in a second!); some are for W/O (read “water in oils”) and some are O/W (read “oil in water”) [everything will be explained, don’t worry 🙂 ]; some give a dry feeling to the cream, some a rich, or a light, or a very smooth touch.
Nothing is left to “chance” and as you start experimenting you will be able to experience the difference from one another.

But now… HOW TO ACTUALLY MAKE A LOTION/CREAM

Christmas Soaps Recipes

My Karma Soap 

DSCF3234

450 gr olive oil

165 gr coconut oil

50 gr castor oil

150 gr macadamia nut oil

185 gr organic palm oil refined

135.7 gr lye

350 gr water

1 tsp Titanium bioxide

My Karma FO

strawberry mica for the swirl

Northern Lights Soap 

DSCF3239

150 gr grape oil

180 gr coconut oil

120 organic palm oil refined

60 gr shea butter

30 gr castor oil

lye 5%

225 water

1 tbsp amla powder

1 tsp poppy seeds

Blend of essential oils of my taste

Rose Soap

DSCF3238

225 gr olive oil

150 gr coconut oil

50 gr macadamia nut oil

25 gr castor oil

50 gr avocado butter (added at trace)

70.1 lye (6%)

165 gr water

1 t rice flour

7 ml rose FO

4 ml patchouli EO

6 ml geranium EO

So these are some of the Christmas soaps I made this year 🙂


Creative Commons License
This work is licensed under a Creative Commons Attribution-NonCommercial-NoDerivatives 4.0 International License.