LAB NOTES & SAFETY NOTICE
For educational purposes only. Content reflects personal, non-professional formulation experiments and is not instructional.
No formula or information on this site is intended for commercial use, consumer application, or third-party use.
Accessing this content means you accept all risks and full responsibility for safety, testing, legal compliance, and outcomes.
[Full Legal Disclaimer & Safety Requirements]
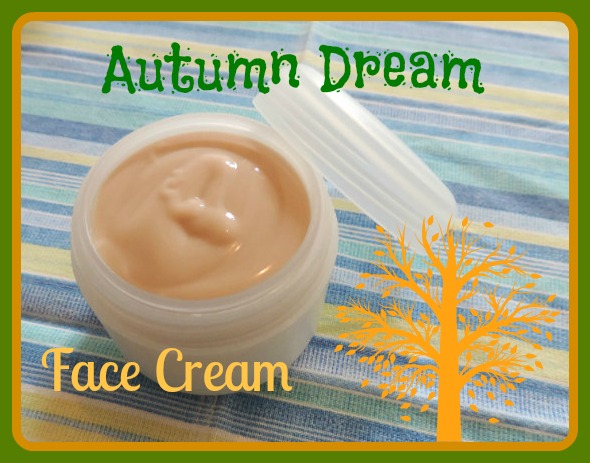
Lab Note: My “Autumn Dream” Face Cream
Hello Hello! 😀 I finally have the recipe and pictures for the autumn cream I’m using right now. I call it my “Poetry” cream because I was feeling a bit artistic when I made it—but also because my sensitive skin needs something truly soothing as soon as the first cold weather hits.
This cream has a higher percentage of fats than my summer formulas, plus a “bouquet” of active ingredients specifically chosen to protect capillaries and calm redness. yeheee!
The Formula:
Phase A (The Gel):
-
Water: to 100
-
Glycerin: 3.0
-
Xanthan Gum: 0.2 (I usually prefer a mix with Carbomer, but mine expired! Xanthan alone still works, though the finish is slightly different.)
Phase B (The Emulsion):
-
Murumuru Butter: 0.5 (Dry skin: 2.5)
-
Safflower Oil: 0.5 (Dry skin: 2.5)
-
Methyl Glucose Sesquistearate: 3.0 (Emulsifier)
-
Cetyl Palmitate: 1.0 (For a soft cream feel)
-
Tocopherol (Vitamin E): 0.5
-
Propylheptyl Caprylate: 1.5 (For a super light skin feel)
Phase C (The Soothing Actives):
-
Oily Part: Bisabolol (0.5), Black Currant Oil (1.0), Dry Flo (0.5)
-
Water Part: Hydrolyzed Silk Proteins (2.0), Allantoin (0.4), Water (5.0)
-
Botanical Extracts: Vitis Vinifera (0.2), Raspberry (0.1), Licorice/Glycyrrhizic Acid (0.2)
-
Hydration: Hyaluronic Acid Gel (5.0)
-
Preservative: Cosgard (1.0)
Notes from my Beaker:
-
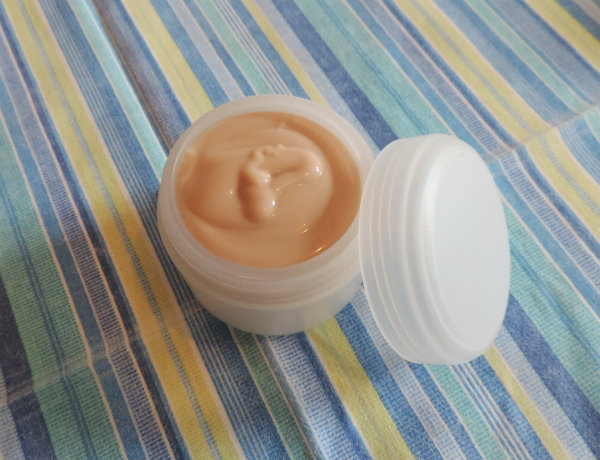
Extract Colors: Just a warning—plant extracts like Licorice and Vitis Vinifera are NOT white! They will change the color of your cream to a more “earthy” tone, but the soothing benefits are worth it!
-
The Allantoin Trick: As always, I mix the Allantoin into the Silk Proteins first. It disperses so much better this way—no crystals!
-
The Process: I heated Phase A and B to 70°C. I poured B into A slowly while stirring by hand, then hit it with the immersion mixer. It turns bright white immediately!
-
The Cooling Phase: This part is very important. I kept stirring with a spatula until it reached room temperature. While it’s hot, it looks very liquid—don’t panic! The Cetyl Palmitate only thickens as it cools (and continues for a few days).
-
The Final Touch: Once cool, I added the two Phase C parts, checked the pH (it hit 5.5 perfectly), and gave it one last quick pulse with the mixer to make it perfectly smooth.
Final Verdict: This is a lifesaver for winter. The Black Currant oil and Licorice extract really help my capillaries survive the cold stress. It might not stay pure white because of the extracts, but it feels like a dream on the skin. ENJOY! 😀 😀 😀


I would very much like to ask you some questions about an alpha hydroxy face cream I am theorizing. How do I contact you by email? I didn’t really understand the contact info at the top of the pages. Thanks for spreading the knowledge. 🙂
LikeLike
Thanks for the lovely recipe! Have you tried adding the xantham gum into the oil phase? I heard that letting it sit in the oil phase for 30 minutes prevents fish eyes (which I had a problem with before – yuck).
Anne
LikeLike
It is not the only way to prevent them. I have tried this method and it works, but I prefere the glycerin 🙂
LikeLike
Do I need to put in more emulsifier if I increase the amount of oils?
LikeLike
Generally speaking “yes”. Of course it depends on the strength of the emulsifier and the quantity of oils 🙂
LikeLike
How to decide on the amount of emulsifier on the quantity of oils? I read all your formulating theory posts but I don’t quite understand it..for this recipe I was thinking of increasing the oils for “normal skin” versions of them
LikeLike
You need to do tests and trials 🙂 it is quite complicated to calculate that before hand and the variables are so many (emulsifiers, co-emulsifiers, different oils or esters or butters and their combination) that the easiest thing is to start with average emulsifier quantity and check if it emulsifies well or not.
If it separates, you know next time you should increase the emulsifier 🙂
LikeLike
Thank you so much for answering! It’s so helpful
LikeLiked by 1 person
You are so inspiring to us all !! Can I add Urea ( with glucondactone sb) to this recipe of autumn hand. ? Need the hydration
Thank you for helping all of us.
Janet
LikeLike
Hi Janet, thank you 🙂
I don’t suggest adding Urea to face creams higher than 0.3-0.4% because it has a way of “hydrating” that is not ideal on the face.
It actually makes the outer layers of the skin “swollen” with water, so it really isn’t ideal on the face. On hands and feet or even body it can be a better idea.
LikeLike