Hello there! 🙂
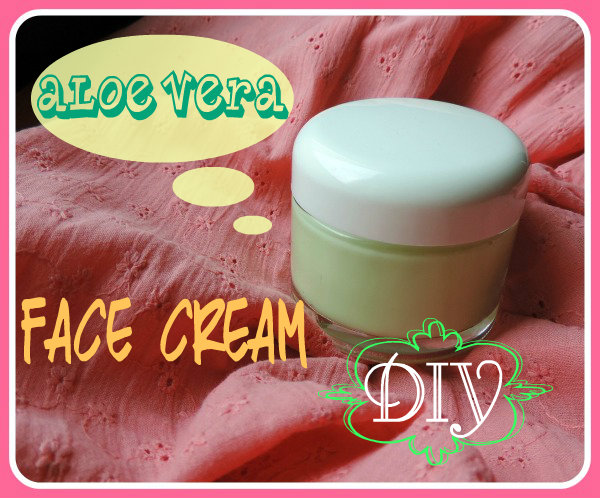
I am back with a new recipe for a summer cream light in texture, very hydrating and nourishing. 🙂
I have been using it for a couple of weeks and I really like it.
Obviously my “grease fall” composition is intended for what my skin likes (nowadays my acne days are only a distant memory but I am always scared it might come back: so I still formulate in order to give my skin fatty acids that won’t give any advantage to acne 🙂 – you can read more HERE). You can, as always, change the grease fall for your own purpose and needs 🙂
The texture is light and quite fluid, it absorbs very easily and it has a quite “matte” finish thanks to the butters.
The active ingredients make for a soothing, hydrating and quite nourishing cream 🙂
Enough words now! 😀
[Warning: if you are new to my blog and find this post overwhelming… trust me, it is not! You just need to learn a bit more about making REAL cosmetics at home and you can read all the info you need starting from the Site Index! As you can see there are theory posts which will teach you how to formulate and how to make creams and other cosmetics.
If you are not new to the making of lotions at home, but you feel overwhelmed by the ingredients that I use… do not worry! Nowadays there are more and more websites which sell cosmetic ingredients online and probably there is at least one in your own country. I have posted a list of the most known – to me – websites of this kind… you can find it HERE!]
RECIPE:
Phase A:
Water to 100 (as always – find the meaning of this HERE)
Glycerin 4 (glycerin is very hydrating but for people with very oily skin it might give a heavy/stiky feeling to the cream. Personally I don’t feel it so I like to add glycerin because it is fairly inexpensive but effective. If you have very oily skin add glycerin at 1% instead of 4%. Do not omit it though, because it is functional to the cream)
Xanthan Gum 0.25 (this is the gelling agent – Even thought xanthan gum, alone, doesn’t make the best gel, I am not using it combined to a carbomer because of the ingredients in this recipe: there are too many ingredients which would break down the carbomer gel and therefore why to waste it… 🙂 )
Phase B:
Methyl Glucose Sesquistearate 3 (this is, as you well know, the emulsifier)
Cetyl Alcohol 1.8 (this is our thickener 🙂 it gives consistency to the cream – and a dry finish)
Kokum butter 1
Murumuru butter 1
Tocopherol 0.5 (our Vitamin E)
Cetiol Sensoft 0.5 (this is a very light synthetic oil which gives a good consistency to the cream. If you don’t want to use synthetic oils then you could try to substitute it with jojoba oil – which is actually an ester – but the consistency wouldn’t be really same. However, being the concentration so low, it is probable you won’t find any difference 🙂 ).
Phase C (the oily – cool down phase):
Safflower oil 1
Black currant seed oil 0.5
Cranberry seed oil 0.5
Bisabolol 0.5 (this is a powerful soothing ingredient – it also helps against the growth of acne bacteria)
Phase C part 2 (the water based – cool down phase):
Hyaluronic Acid Gel 3 (we have made it HERE)
Aloe Vera Powder (200:1) 0.5 (I used an organic aloe vera powder)
D-Panthenol 1 (Vitamin B5)
Allantoin 0.4 (soothing active ingredient)
Silk Hydrolized Proteins 2.6 (you can substitute with any other kind of hydrolyzed proteins you own)
Preservative (at the concentration needed for the specific preservative you use)
Extras:
– Fragrance oil (of course of at least Cosmetic grade)
– One drop of food colorant
As always, the HOW TO is very similar to all the other recipes of creams I have done.
Here a little sum up:
1) Pour the Xanthan gum on top of the Glycerin, stir.
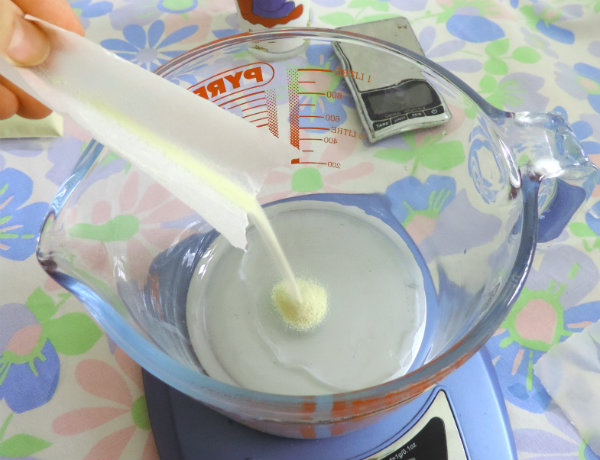
2) Slowly add the water of the Phase A:
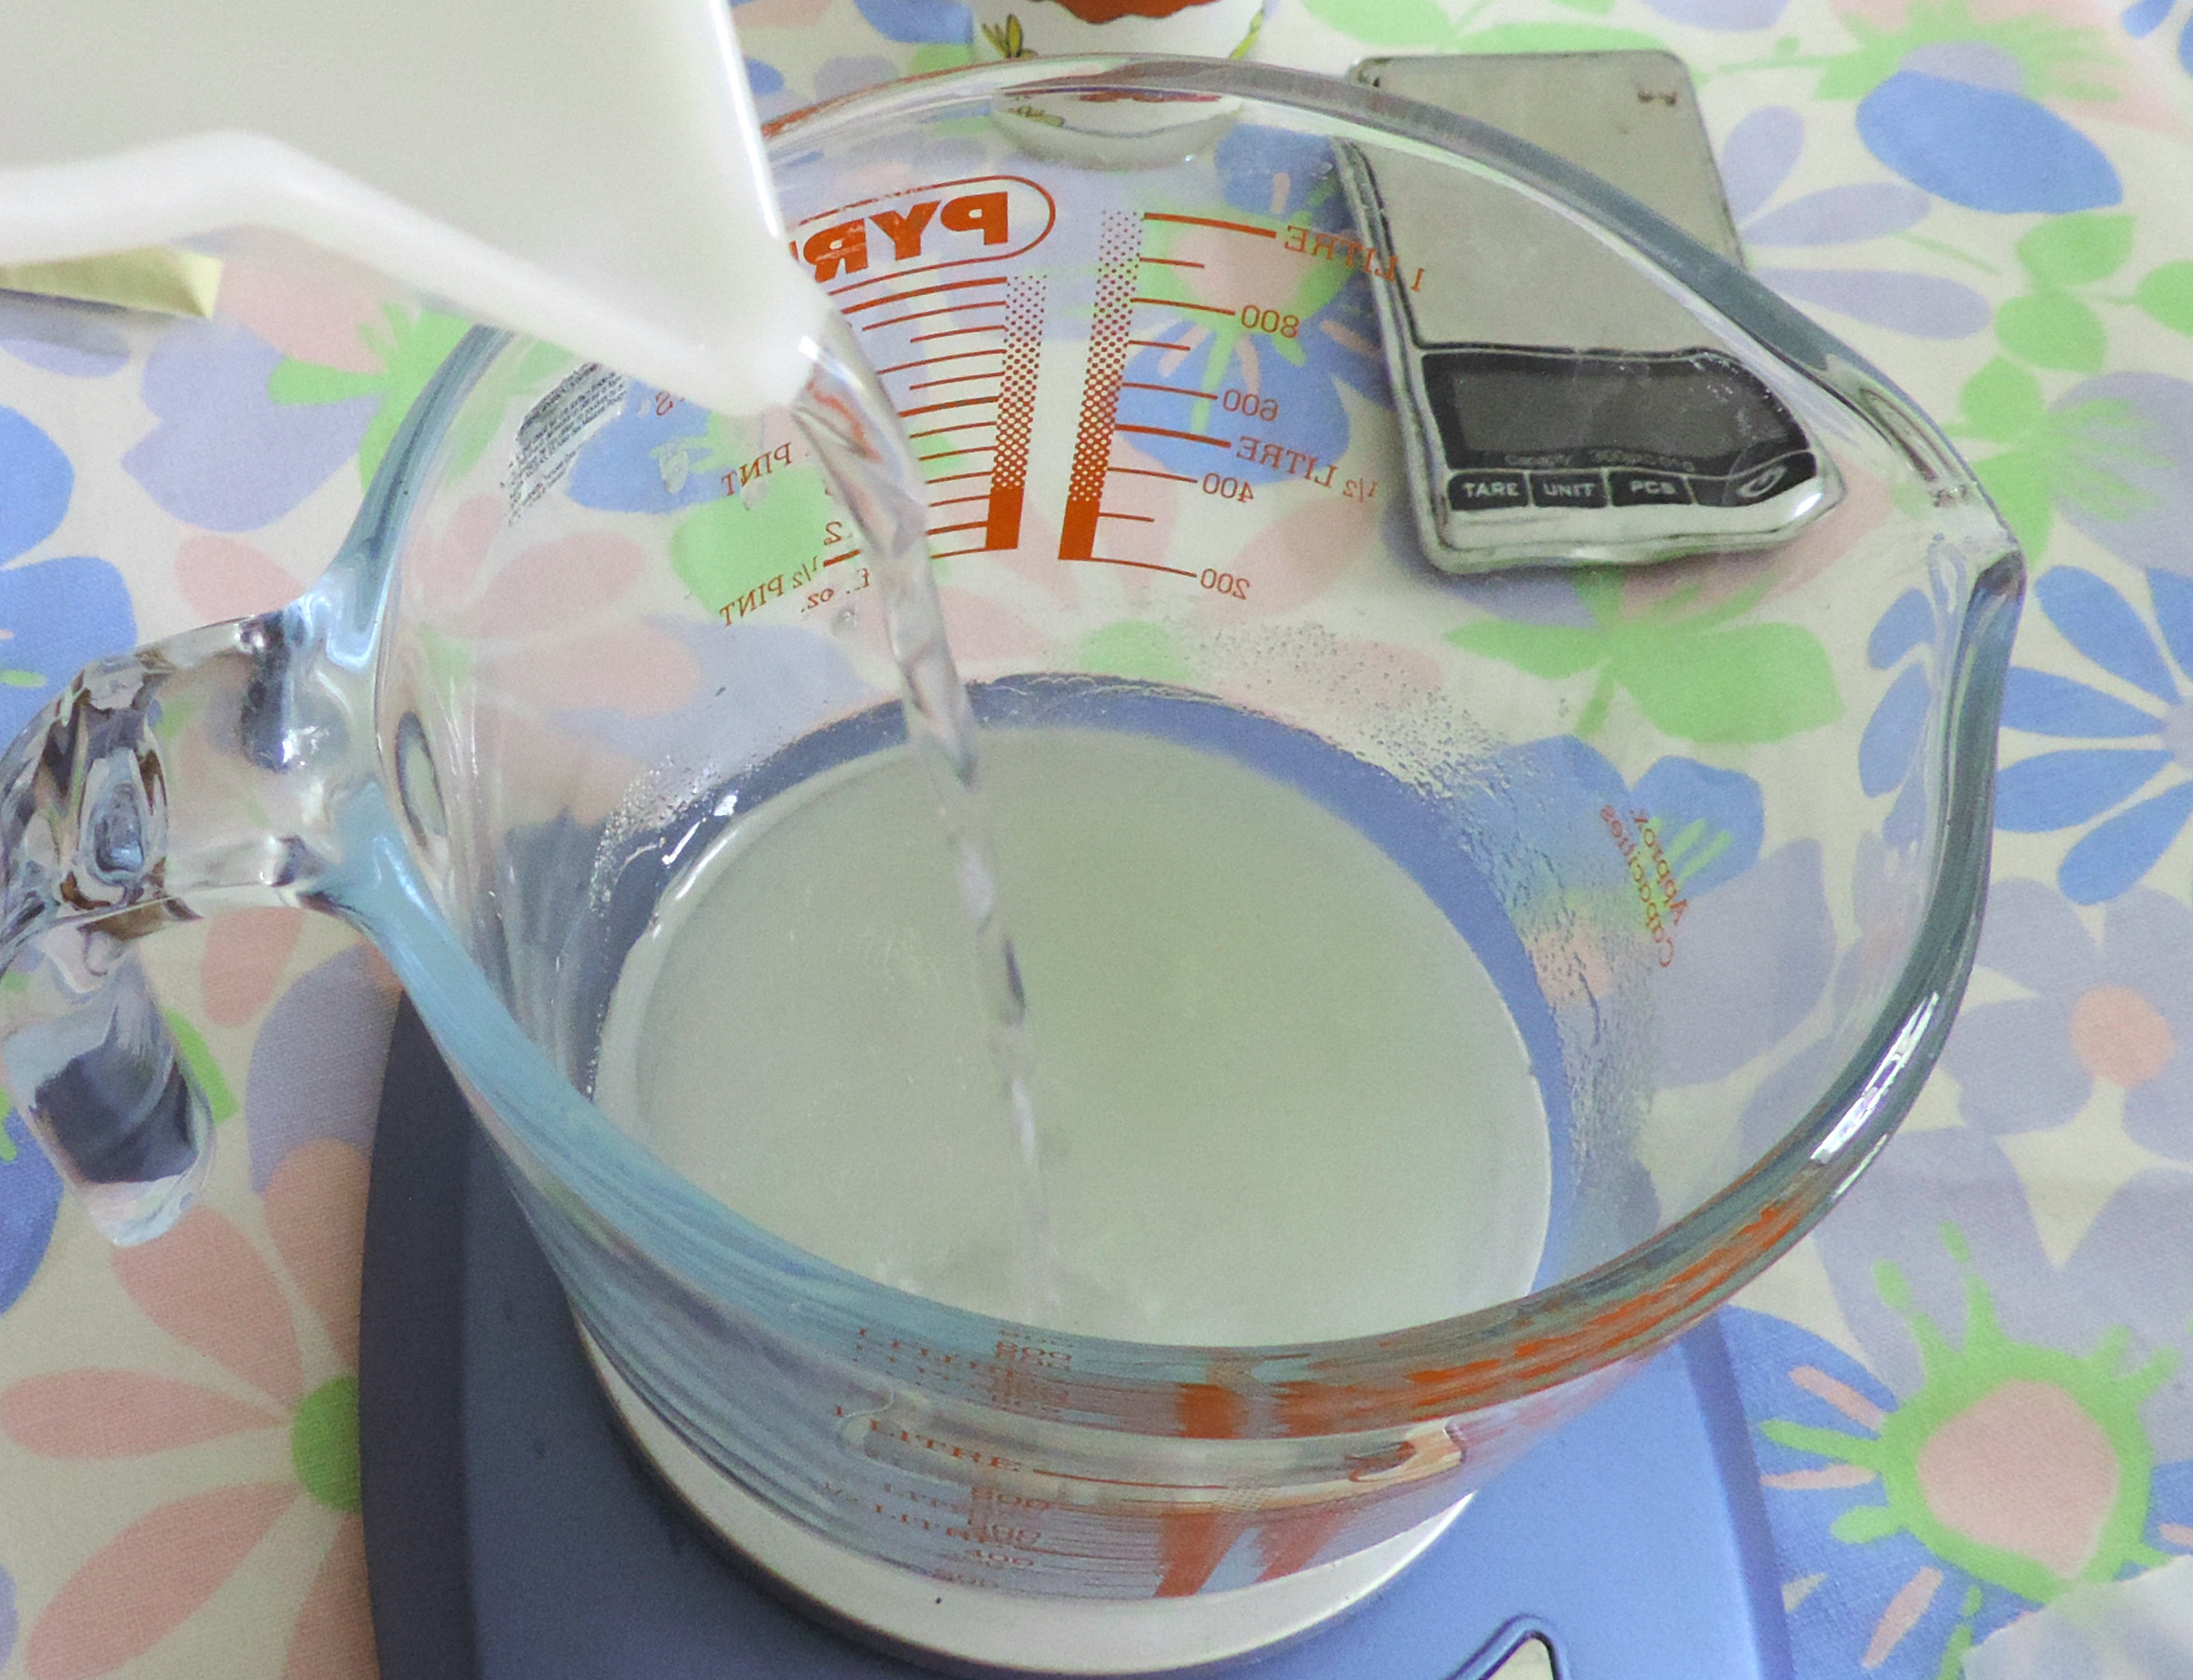
3) Now measure the Phase B.
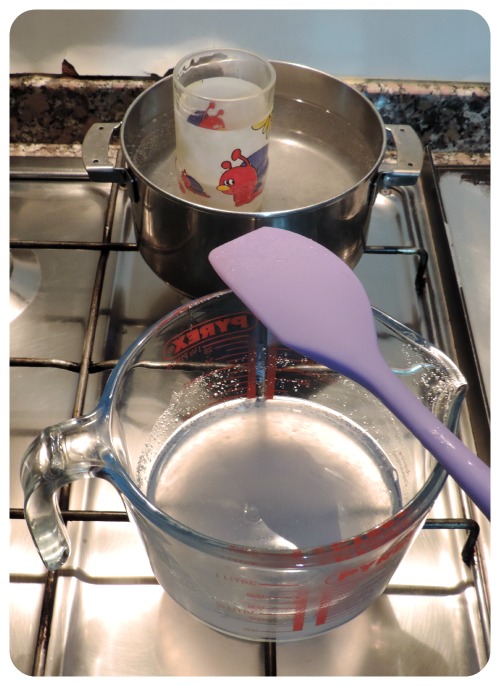
4) Place Phase A and Phase B in a double boiler and heat them up to 70°C
5) Pour the Phase B into the Phase A into 2 or 3 steps.
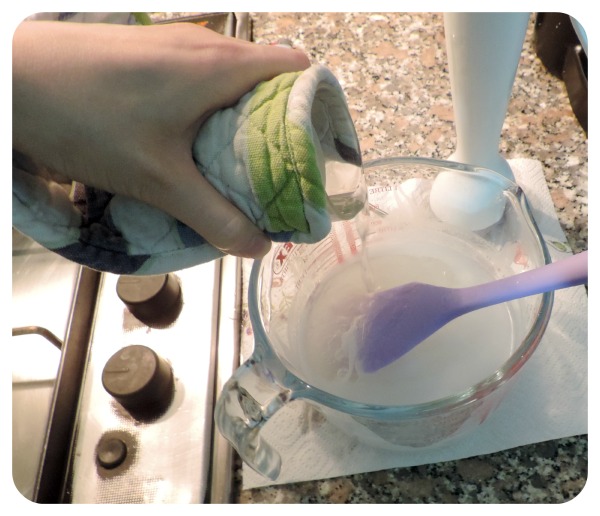
6) With a stick blender or immersion mixer, mix the two phases together until well emulsified:
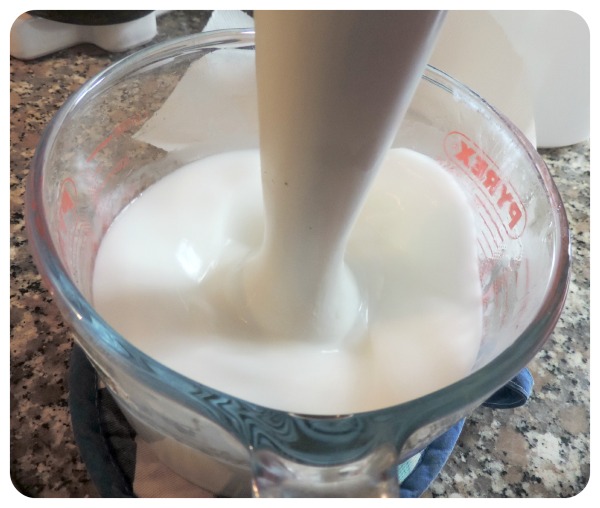
7) Keep stirring with a spatula until the emulsion reaches room temperature (DO NOT SKIP THIS STEP! Yes it takes time, yes it is boring but if you don’t do it your emulsion will separate and you will have wasted ingredients…)

ps. In this picture the cream is already cooled down so it is a little bit thick. Don’t be scared if, in the beginning, the emulsion will be very liquid almost like milk! It is normal.
8) When the cream is at room temperature, add the two Phase Cs (you add one, mix with a spatula… add the second one and mix again with a spatula).
9) When all looks good and emulsified, give it a last stir with the stick blender (it will make the cream more smooth and stable).
Avoid adding air to the cream or it will form bubbles, which can eventually make your emulsion break down.
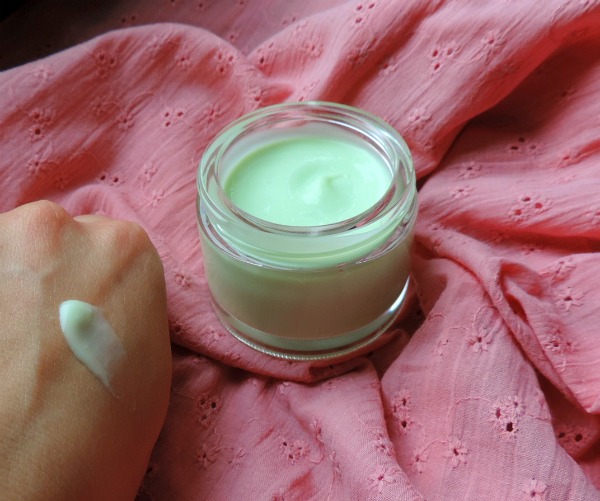
10) Add fragrance and color to your liking. (I added cucumber fragrance and one drop of green food coloring giving the cream a fresh feel 🙂 Obviously you can omit this step).
Tadaaa 😀 😀 😀
Hope you liked this recipe!
For more recipes click HERE
To learn how to formulate cosmetics click HERE
For a list of online cosmetic ingredients suppliers click HERE
Any question? 🙂
Do you have any cosmetic you would like me to try and formulate? 🙂
HAVE A GREAT DAY! 🙂


what a beautiful creation! I want to use it! thank you for sharing!! 🙂
LikeLike
thanks Eeting! 😀
LikeLike
one thing i’m not sure if! for preservative that needs to be slightly acidic to work best (eg cosgard, optiphen ND etc), is it okay to add the preservative before pH adjustment or should we adjust pH first before adding the preservative?
LikeLike
Usually I add the preservative at the very end with the pH already adjusted (and then give a last mix with the immersion mixer).
I have added it also at the beginning (for example in creams that didn’t need to be heated)… however I don’t know if it can make a difference.
Just to be sure, I think it is best to add it when the pH range is already compatible 🙂
LikeLike
thank you :))
LikeLike
Wow it looks very light and…yummy hehe
LikeLike
I am new to your blog and I have to say that when I first see the recipe, it is indeed overwhelming. But when I read more, it is actually very detailed and well-structured. I like the green color, very refreshing and I also believe this is perfect for summer time. Will definitely give it a try, thanks for sharing 😀
LikeLike
Thank you for the lovely comment Janet! 🙂
Let me know when you try it 🙂
LikeLike
Lovely Pista green. This cream looks so perfect that I feel like tasting it. 😛
LikeLike
😀 😀 😀
LikeLike
Love it. Love your blog.
LikeLiked by 1 person